How to troubleshoot and resolve many common issues
- CAN I INSTALL A TORQUE CONVERTER ON MY MINIBIKE?
- CAN I INSTALL A TORQUE CONVERTER ON PREDATOR ENGINE?
- I HAVE 2 FUEL LINES COMING FROM THE GAS TANK
- MY GOKART WON'T START
- KIDS GOKART WON'T START - BRAKE SWITCH
- I NEED THE MANUAL FOR MY VEHICLE
- I'M SETTING UP MY 200/300 BUGGY AND IT WON'T START
- HOW TO DETERMINE YOUR CHAIN SIZE
- TECHNICAL BULLETIN: KANDI BUGGY WHEEL HUBS
- I NEED PARTS FOR MY ROAD RAT RACE KART
- HOW TO CHANGE THE OIL, GY6 150/200 BUGGY
- BUGGY SHUTS OFF OR WON'T STAY RUNNING:
- MECHANIC ADVISORY, BUGGY SETUP GUIDE
- MY 150cc BUGGY STARTS BUT DOESN'T MOVE
- HOW DO I REMOVE THE GOVERNOR ON A HONDA GX200 and clones
- HOW DO I ADJUST THE VALVES ON A GY6 150/200
- 150 FUEL LINE HOOKUP, VACUUM LINE
- FUEL PROBLEMS
- MY BRAKES FEEL SOFT
- MY BIKE ENGINE RUNS ROUGH WHEN I GIVE IT FULL THROTTLE
- MY BIKE WON'T START
CAN I INSTALL A TORQUE CONVERTER ON MY BAJA MINIBIKE?
Yes, We have a Baja / Coleman TC2 Kit if your engine has a drilled and tapped crankshaft. If your crank is threaded, you will need the special lug nut. Click on the picture of the Torque Converter on the left as you scroll down any page of our website. Most Baja's do but some newer ones like the Coleman might not. You need to be able to screw in a bolt on the end of your crankshaft to fasten the Driver Clutch of the GTC Torque Converter. Baja Minibikes are a bit slow out of the box. The TC2 will definitely wake up your Baja. You will notice an amazing difference. What do you do if the crank isn't tapped? The only real choice is to replace the engine. When you view the Baja TC2 kit, you can add a Titan Engine. They will bolt right up and install on your Baja
CAN I INSTALL A TORQUE CONVERTER ON PREDATOR ENGINE?
Yes. Use the 1002P. the Predator has a shoulder at the crankshaft base that sits about 1/8" lower than a true Honda or Clone engine. This will cause the Driver to rub on the mounting plate. Solution: You will need an extra 1/8" x 1-1/8" OD washer to install onto the crankshaft before you install the spacer. This will push out the Driver an additional 1/8" and provide proper operation and belt alignment. Part#1057 Predator Crank Washer. Included with the Predator version TC2 kit
I HAVE 2 FUEL LINES COMING FROM THE GAS TANK
Many 150 Buggies DO NOT utilize a vacuum line. If your 150 has 2 lines coming out of the Fuel Valve on the Fuel Tank, one Line, usually the one with a Fuel Filter connected to it, is the Fuel Line. The other line is the Vacuum Line. Proper installation of the Vacuum Line is important because it opens the Fuel Valve with Vacuum. Your Buggy will not start or operate properly if the Fuel and Vacuum Lines are not properly installed. Check the 150 Vacuum Line setup guide in the Documentation section of our website for full information
MY GOKART WON'T START
TIP: Spray a little quick start into your air intake or air filter. Most of the time, this is all that is needed so start a stubborn engine. Make Sure to step on the brake while starting the engine. There may be a safety switch that prevents the engine from starting unless the brake is depressed. Also, there may be a low-oil sensor on your engine. Make sure you drain any break-in oil and install fresh 10/40 oil before operating your engine.
Customers call all the time and tell us: my gokart won't start
The answer is frequently: you have a dead battery! Be sure to add the electrolyte (battery acid) to your battery and charge for 8 hours prior to starting your engine.
Customers are surprised to learn that batteries can drain in as little as 24 hours. Batteries are not covered under warranty. Use this Battery Tender everytime you're done for the day and you can stop buying new batteries. We DO NOT recommend using other battery chargers: they will damage your battery
Battery Tender is much more than a trickle charger. It has a brain. It's lightweight, compact, and fully automatic; easy to use, especially in small spaces. Keep your battery fully charged so that it is ready to go when you are!
The Battery Tender can be found in the Accessories section of our website.
KIDS GOKART WON'T START - BRAKE SWITCH
Some kids gokarts, including Kandi, have a switch at the brake pedal that prevents the engine from starting if the brake pedal is not firmly pressed. This is to prevent the kart from taking off when the engine is started
I NEED THE MANUAL FOR MY VEHICLE
Your Vehicle will be delivered with the Manufacturer Manuals if available. Manuals and Setup Guides can also be downloaded from the Documentation section of our website. Some Guides are intended to provide general supplemental information only and are NOT Model or Manufacturer specific. Qualified mechanic must perform the setup. All Users must Obtain and Consult the OEM Manual for specific information regarding Operation, Maintenance, Repair and Safety of your vehicle. The information contained in this guide has been provided by Manufacturers. While the information herein is deemed to be accurate, no representation or warranties are made, express or implied, as to the correctness or completeness of the information contained herein. WARNING: Failure to obtain current information from the manufacturer can result in injury or death
I'M SETTING UP MY 200/300 BUGGY AND IT WON'T START
NOTHING HAPPENS WHEN I TURN THE KEY.
Check your wires and fuses. Check ignition switch. Check for any brake safety switch.
THE ENGINE TURNS OVER, BUT WON'T SPUTTER.
Check the fuse in the black box in the engine area. If this fuse is spent, the engine will turn but it won't start. Make sure there is sufficient fuel in the tank. Make sure any fuel valve is in the ON position. Check the fuel flow at the carburetor. Check the coil wire and spark plug cap are properly connected. Remove spark plug, check for spark.
THE ENGINE TURNS OVER AND SPUTTERS, BUT IT WON'T START.
Make sure there is sufficient fuel in the tank. Make sure any fuel valve is in the ON position. Check the fuel flow at the carburetor. Sometimes, there may be an air bubble in the fuel line. Use a little Quick Start.
I HAVE 2 FUEL LINES.
If your machine uses a Fuel Valve system, and you will see 2 lines coming from the gas tank. One line is fuel and the other line is vacuum. The vaccum line opens the fuel valve to let fuel into the carb. The vacuum line comes from the fuel valve to a T connector. One side of the T connector then goes on the side of the carburetor to provide the vaccum. If the vaccum line and is not hooked up correctly, your engine will not idle or run properly because it will be starved of fuel. Please see the 150 Vaccum Setup Guide for full information. Click on Setup Guides located in the Stuff section on our website.
HOW TO DETERMINE YOUR CHAIN SIZE
Chain Size, Chain Pitch Size, Roller Diameter, Roller Width, Pin Diameter
#35 3/8" 3/16" 3/16" 1/8"
#40 1/2" 5/16" 5/16" 5/32"
#41 1/2" 5/16" 1/4" 1/8"
#420 1/2" 5/16" 1/4" 5/32"
A chain consists of steel pins that are rubbing inside of "steel tubes". These are commonly called rollers, but it is obvious that they do not roll. They just rub back and forth at very high speeds, under considerable load, pressure and heat. Squirting oil or even chain lube directly on these rollers does very little good unless the lubricant is given time to penetrate between each pin and the corresponding "tube". The lube must go along the side links on each side of the chain, then allow 8 to 10 minutes for penetration and evaporation before starting the engine to ensure the centrifugal force will not sling it away. The clutch sprocket and the main drive sprocket should be perfectly aligned so that they don't rub against the side links. Rubbing wears the teeth and ABSORBS HORSEPOWER.
All chains stretch over time. When the chain starts falling off the sprocket then it is time to move the engine forward or backward to take up the slack in the stretched chain. There are four bolts that hold the engine on the motor mount plate. Take an open-end wrench and a socket wrench (most likely a 9/16") and loosen the four bolts- pull back the engine until you take up the slop in the chain. Tighten the bolts back again but make sure the two sprockets are perfectly aligned with each other. You don't want the sprockets out of alignment because this will cause the chain to come off or wear the sprockets unevenly. Leave about a ½" of play between the top of the chain and the bottom don't pull the engine back where the chain is a tight as you can get it. A tight chain can cause the kart to move in neutral with no one in the drivers seat. A tight chain puts friction on the bushing or roller bearing, which could cause it to engage when the engine is idling. Make sure you properly retighten the motor mount bolts when the desired chain tension has been achieved.
Replace your chain when installing a new clutch or sprocket unless the chain is very new. If you are cutting a new chain make sure you don't cut it too short. You can always remove links but you can not add more than half a link.
If a replacement clutch or chain is required, determine the chain pitch size your machine is equipped with. Most American made fun karts and mini bikes use either #35, #41, #420 or #40 chain. Some chains have the chain pitch size stamped on the chain, some do not. Use the chart below as a guide.
TECHNICAL BULLETIN: KANDI BUGGY WHEEL HUBS
Wheel Hubs are NOT torqued down at the factory on many buggies. Operating the buggy without properly tightening the wheel hubs will result in overheating and very quick bearing failure. Make sure to Torque Down your Wheel Hubs prior to installing the wheels. Check your wheel hubs periodically and torque as needed. Eventually, you may need to use shims to maintain tightness
I NEED PARTS FOR MY ROAD RAT RACE KART
Road Rat Parts for all models can be found by clicking on the Race Kart link in the Products section of our website
HOW TO CHANGE THE OIL, GY6 150/200 BUGGY
Operating your Buggy for without proper lubrication is the fastest way to severely damage your engine and transmission. Even just a few minutes of running the engine with low or no oil can cause engine failure. Your engine and transmission can give you many years of reliable service, provided you follow these important steps outlined in this guide. The 150 Buggy Lubrication guide can be found in the Documentation section of our website.
Pre 2010 GY6 150 engines have two major components which require lubrication. The Engine which requires 10/40 and Reverse Gear Box which requires 90w Gear Oil. Proper lubrication is required prior to operation. Newer models now have Integrated Reverse and do NOT require Gear Oil.
BUGGY SHUTS OFF OR WON'T STAY RUNNING:
* Check Gas and Oil: Sometimes there may not be enough fuel in the tank or there may be an air bubble in the fuel line. Fill the tank at least 3/4 full with fresh gas.
* Disconnect the fuel line at the carb or intake (efi) and check for a strong fuel flow.
* Water is in Gas Tank: If your engine has water in the gasoline, it will start, run for a few seconds, then the engine will die. You can look at the bottom of the gas tank to see water beading if it is present.
* Loose Spark plug wire
* Clogged or wet air filter
* Faulty stop switch or connection
* Throttle cable is grounding to the engine stop terminal
MECHANIC ADVISORY, BUGGY SETUP GUIDE
Factory Direct: When you purchase a Buggy Factory Direct, you can save a substantial amount of money.
However, this means you must perform the vehicle setup when your Buggy arrives. Your Buggy is NOT A KIT. Your Buggy is assembled at the Factory, and then packaged for shipping. It will arrive with ALL MAJOR COMPONENTS INSTALLED including, Engine, Transmission, Brakes, Steering Systems, and Controls etc.
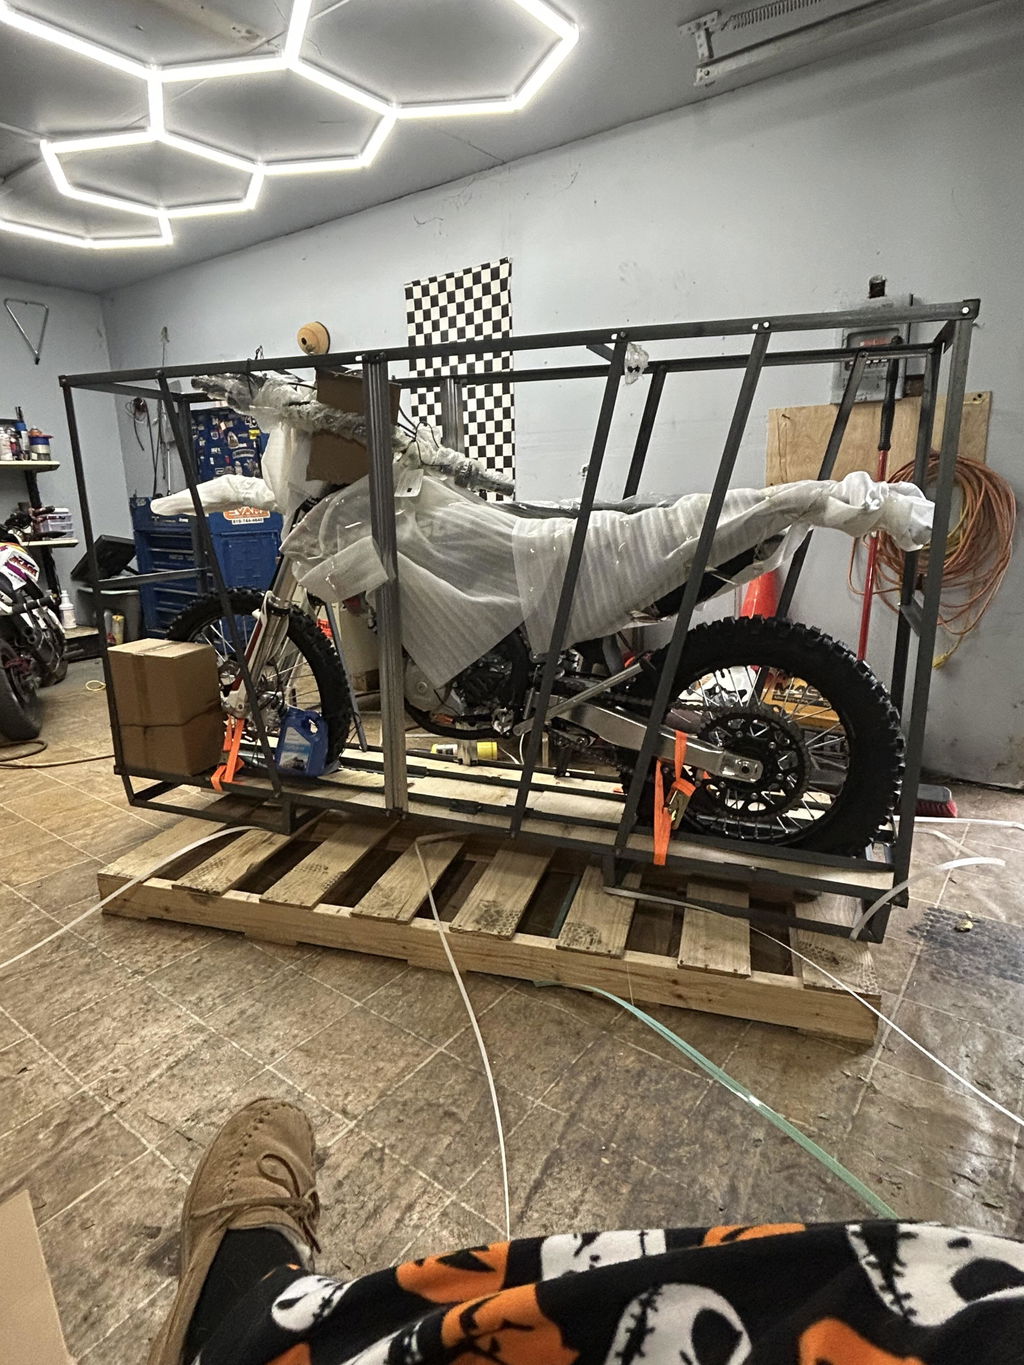
Your Buggy will arrive in a large crate. You must uncrate and setup your Buggy when you receive it. If a manual is available for your model, it will be delivered with the vehicle. If not, you can download a manual here as a supplement to any setup guide provided by the manufacturer
Mechanic: Although the setup is not a particularly difficult task, it does require some mechanical expertise. It is Strongly Recommended that if any setup task is beyond the scope of expertise of the customer, that the customer seeks a Qualified Mechanic to perform the setup of the vehicle. In addition to voiding the warranty, Damage, Serious Injury or Death can result form improper setup of a vehicle. click on Setup Guides in the Stuff section of our website
MY 150cc BUGGY STARTS BUT DOESN'T MOVE
This tranSmission related issue is most commonly caused by the Reverse Gear Cable needing adjustment, causing the transmission to stay in neutral and not shift completely into forward gear. Adjust the cable and linkage so as to enable the proper shifting into Forward, Neutal and Reverse.
Another cause can be a damaged Drive Belt. Remove the plastic cover on the CVT Transmission and inspect the belt and replace as needed. Belts can be found in the 150 Buggy Parts, High Performance section of our website.
Damaged Clutch Shoes or Springs can also cause this problem. Inspect and replace your clutch as needed. We recommend selecting a complete clutch kit like the GTC Superfly or the Dr. Pulley HiT Clutch. Clutches can be found in the 150 Buggy Parts, High Performance section of our website.
HOW DO I REMOVE THE GOVERNOR ON A HONDA GX200 and clones
For a Detailed Procedure with photos, see our Documentation Section.
QUICK INSTRUCTIONS:
The quickest way is to disable the governor rather than remove it. This can be done by replacing the stock throttle spring with a wire. You can use a heavy duty paper clip that has been straightened out. Make a hook at both ends at the correct length with needle nose pliers.
For racing purposes, follow the procedure below to remove the governor.
The governor restricts the engine to 3600 RPM. With the governor removed, the RPM will increase to about 5200 resulting in a substantial increase in performance.
REMOVE GOVERNOR:
(1) Remove the engine side cover (crankshaft side)
(2) You must remove the plastic gear inside the crankcase. This is the governor. Use pliers to remove gear. You must also remove the metal arm coming from the top of the engine.
(3) Pull the metal arm up as far as you can and cut it with a hacksaw or other tool. Pull the remainder of out of the engine.
(4) Make sure to remove all washers and clips from the engine. Use a self-taping 1/4"-20 bolt to plug the hole on the top of your engine case where the metal arm was.
(5) Cut or disconnect the low oil sensor wire on the outside of the engine because it will interfere with engine operation. If you will be using a billet rod, you will need to completely remove the low oil sensor and plug the hole with a 3/8" x 1 bolt.
HOW DO I ADJUST THE VALVES ON A GY6 150/200
There are (4) 8mm bolts that hold the cylinder cover over the head. Removing these 4 bolts gives access to the overhead valves and the timing chain. You set the engine to Top Dead Center by aligning a mark labeled "T" on the cam gear with a mark on the block. Then you loosen the lock nut on the end of the lifter and adjust the clearance from the cam to the lifter to .02 in(.5mm or .508mm). Adjust both the intake and the exhaust valves and tighten the lock nuts when finished. Remove the spark plug wire and turn the engine over couple of times and recheck the clearance before putting the cylinder cover back on.
150 FUEL LINE HOOKUP, VACUUM LINE
Starting from the Valve on the bottom of the Tank:
The top line is fuel. It will come from the tank into a filter and into the driver side
of the carburetor (towards the rear, where the air cleaner hose hooks on).
The same Valve on the bottom of the Tank:
The bottom line is a vacuum. It comes from the tank To a "T" fitting and plugs in there.
On some units they plug the drain line coming off the bottom of the carburetor into the
"T". If so unplug it and plug in the vacuum line from the tank. Just let the drain hose
fall down as it doesn't plug to anything.
FUEL PROBLEMS
Often times, there may be some debris in the Gas Tank from the factory. Have your mechanic check your fuel system. Check for a strong fuel flow at the Carburetor. Make sure you have plenty of gas in the tank. Check the Tank and Fuel Filter for dirt, debris or obstructions. Finally, if some debris got into the Carburetor, you will need to clean out the float bowl. Even the tiniest fiber or dirt can cause a problem. The problem could also be choke related. Check the electrical connections on the choke. On a 150 Buggy, see the Fuel System Guide in our Documentation section.
MY BRAKES FEEL SOFT
This probably just means that you need to bleed your brakes or you have a leak in one of your lines. Clean up your lines an check to see if there is a leak whenever you push on your brakes. If there is no leak, get an 8mm wrench and loosen the bleed bolt on the brake just slightly. Push down on the brakes until you have pressure and hold. Then loosen the bleed bolt and let the air out of the lines and then tighten the bolt back quickly. Pump the brakes and see if you have pressure again. If not, try this a few more times. You also might need put more fluid in your lines. Check the level. If it is low, put more fluid in and then bleed the brakes again. If there is still no pressure then your brakes are probably going out and you will need to replace them.
MY BIKE ENGINE RUNS ROUGH WHEN I GIVE IT FULL THROTTLE
This can be caused by a few things. The first thing you want to check is your spark plug. Usually it is something fuel related but a bad spark plug that is not giving great spark can make your bike run crappy. Its pretty rare but its simple to check, and ngk spark plugs aren’t that expensive. The spark plug is a CR6HSA or CR7HSA NGK. The next thing that you want to check is the carburetor. Take the carb off the bike and remove the 4 screws from the bottom of the carb. You will see 2 gold screws, the bigger one is the main jet, the smaller one is the pilot (most pit bikes). Shoot contact cleaner through the holes and blowout any gunk that could be stuck in the jets. Make sure the bottom bowl in the carb is clean as well. Go ahead and put the carb back together and put the carb back on the bike. Test the bike and see if its running great. If it is not changed then go ahead and take the top of the carb off. Unscrew it from the top and pull the slide out. Whenever you pull the slide out, take the needle out of the slide and move the c clip on the needle up one slot. Put everything back together and check the bike, if it is still running bad, take the carb back off and move the c clip up one more slot. If it is still running bad after that then you may need a new carburetor.
MY BIKE WON'T START
Spray a little quick start into your air intake or air filter. Most of the time, this is all that is needed so start a stubborn engine. Sit on the bike with the kickstand in the up position. Some bikes have a safety feature whereby the starter will not engage unless the kickstand is up. Also, there may be a low-oil sensor on your engine. Make sure you drain any break-in oil and install fresh 10/30 oil before operating your engine.