




TL;DR:
- A disciplined go-kart tuning workflow improves consistency by focusing on systematic adjustments, data recording, and testing.
- Separating testing from lapping and establishing a reliable baseline are essential for diagnosing setup effects accurately.
Most go-kart enthusiasts hit a wall where more seat time stops translating into faster laps. The kart feels different every session, adjustments seem to cancel each other out, and race day results feel like a coin flip. A disciplined go-kart tuning workflow changes all of that. Instead of chasing problems with guesswork, you build a repeatable system where every change has a purpose, every session produces data, and your setup gets sharper week after week. This guide walks you through exactly how to do that, from tools and baselines to engine optimization and adapting to track conditions.
Table of Contents
- Key takeaways
- Getting your tools and baseline ready
- Chassis tuning: big changes first
- Engine tuning and dyno work
- Testing versus lapping
- Adapting to track and weather conditions
- What I have learned from years of structured tuning
- Gear up with Gokartsusa for your next tuning session
- FAQ
Key takeaways
| Point | Details |
|---|---|
| Start from a baseline | Always return to the manufacturer’s recommended setup before testing any single change to isolate its effect. |
| Separate testing from lapping | Testing evaluates changes; lapping builds driver consistency. Mixing the two produces unclear results. |
| Make one change at a time | Stacking multiple adjustments before retesting makes it impossible to know what actually moved the needle. |
| Document everything numerically | Use setup sheets and a 1-10 feel scale to track changes and confidently return to winning configurations. |
| Adapt to track conditions | Tire pressure, ride height, and chassis flex all need adjustment when grip levels shift between sessions. |
Getting your tools and baseline ready
The foundation of any effective go-kart tuning workflow is showing up prepared. Showing up with the right equipment is not optional. It is what separates a productive testing day from a frustrating one.
Your core toolkit should include a tire pressure gauge, caster and camber alignment tools, a ride height gauge, a corner weight scale if you have access to one, and a dedicated setup sheet for every session. Digital versions work well, but a printed sheet on a clipboard is reliable and fast at the track. The setup sheet is where you record tire pressure, ride height measurements, axle selection, seat position, and any chassis changes you make. Setup sheets help drivers adapt to changing conditions like rubber buildup and wet tracks, and they make replicating a fast setup at the next event straightforward.
Before you touch a single bolt, establish your chassis baseline using the manufacturer’s recommended settings. This sounds basic, but many hobbyists skip it and build their “baseline” on top of someone else’s adjustments or last session’s emergency fix. A stable baseline prevents the kart from giving you misleading feedback during transient changes. Baseline is not about perfection. It is about having a known, repeatable foundation you can always return to.
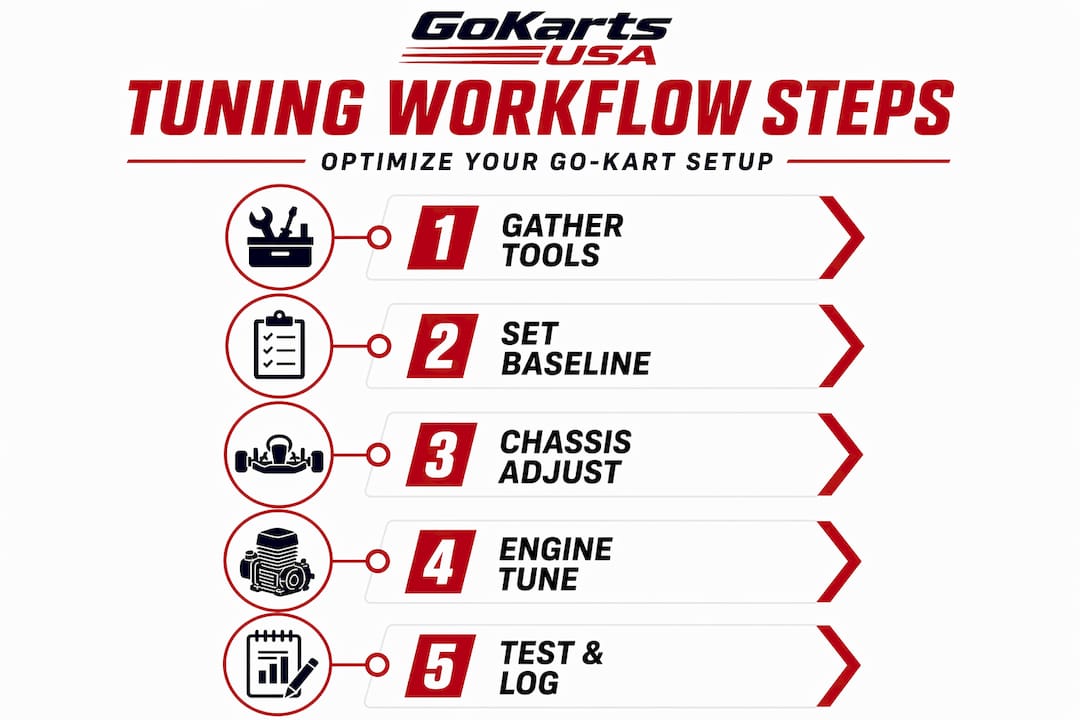
Pro Tip: Before every test day, photograph your current setup from multiple angles and log every measurement on your sheet. If a session goes sideways, you can rebuild your baseline exactly, rather than guessing from memory.
Here is a short checklist of what to confirm before your first session:
- Tire pressures set to manufacturer spec and equal side to side
- Seat and pedal position confirmed and logged
- Axle selection noted (soft, medium, or hard)
- Ride height measured at all four corners
- Chain tension checked and sprocket alignment verified
- Safety gear inspected, including helmet, gloves, and rib protector
Safety preparation matters just as much as mechanical prep. Never head onto the track without confirming all fasteners are torqued, the steering column is secure, and brakes are functioning properly.
Chassis tuning: big changes first
Once your baseline is locked in, the actual go-kart tuning steps begin. The rule here is simple and non-negotiable: start with large adjustments before dialing in the finer details.
Here is the sequence to follow:
- Seat position. The seat is the single most impactful chassis variable. Moving it forward increases front grip; moving it back shifts weight rearward and reduces front bite. Start here before touching anything else.
- Axle selection. A softer axle flexes more and releases the inside rear wheel more easily, which suits tighter tracks. A stiffer axle suits high-grip tracks where you need the chassis to stay planted.
- Ride height. Raising the ride height shifts the center of gravity upward, increasing chassis flex and generally adding grip in the turns. Lowering it does the opposite.
- Caster and camber. These finer adjustments affect how the front wheels load through corners. Save them for after the big-ticket items are sorted.
- Weight distribution and ballast. Once the kart’s behavior is close to where you want it, use ballast positioning to fine-tune corner entry and exit balance.
While you work through these steps, quantify your feel on a numeric scale. Instead of writing “understeer” in your notes, rate it: “front pushes at corner entry, 6 out of 10.” That specificity makes it far easier to track whether your next adjustment moved the needle in the right direction, and by how much.
Pay close attention to these common handling signals: consistent understeer on corner entry often means not enough front grip, which can point to caster adjustment or seat position. Oversteer mid-corner usually signals too much rear grip release, often corrected with a stiffer axle or lower ride height. Rear tire overheating is a sign the kart is working the rear wheels too hard, which can tie back to axle stiffness or chassis flex.

Pro Tip: Only make one change between runs. Every time you stack two or three adjustments at once, you lose the ability to identify which one fixed the problem or created a new one. Patience here pays dividends on race day.
Engine tuning and dyno work
Chassis setup gets most of the attention in hobbyist circles, but go-kart engine optimization is equally important for squeezing out consistent performance. The challenge is that engine tuning without data is mostly guesswork.
Dyno testing removes guesswork from engine tuning by giving you measurable horsepower output, torque curves, and air/fuel ratios at different RPM ranges. That data tells you whether your carburetor jetting is rich or lean, where your power peak sits, and whether a recent change to your exhaust or intake actually did what you hoped. Without a dyno, you are relying on feel and lap times, which are influenced by too many other variables to be reliable for engine diagnosis.
Here is how to approach engine tuning within your overall workflow:
- Establish a known engine baseline before the season, ideally after a fresh rebuild or inspection.
- Log your current jetting, ignition timing, and exhaust setup on your setup sheet alongside chassis settings.
- Professional engine blueprinting includes inspecting, measuring, and balancing components to factory or better tolerances, which gives you confidence that your baseline is honest.
- If you notice a drop in power output that does not correlate with chassis changes, schedule a dyno session rather than trying to chase it at the track.
- Engine tuning and chassis tuning should run as parallel tracks in your workflow, not sequential ones. Address obvious engine issues before a chassis test day so you know the kart’s behavior is being driven by setup, not mechanical variance.
“Dyno-based engine tuning removes the guesswork inherent in guess-and-check at the track, allowing precise jetting and power optimization.” — Ron White Racing Engine Services
Turnaround on professional dyno work typically runs one to three days for a standard carbureted kart engine. Plan it into your off-track schedule, not as a reaction to a bad race weekend.
Testing versus lapping
This distinction is the most overlooked principle in go-kart performance tuning, and confusing the two is the biggest tuning workflow mistake hobbyists make.
| Session Type | Purpose | How to Run It |
|---|---|---|
| Testing | Evaluate the effect of a specific setup change | 3-5 laps per change, return to baseline between each test |
| Lapping | Build driver consistency and muscle memory | 100-plus consistent laps at a stable baseline setup |
Testing is structured and analytical. You make one change, run a short stint to feel the difference, log the result with your numeric scale, return the kart to baseline, and test the next variable. The goal is cause and effect, not fast laps.
Lapping is the opposite in spirit. You keep the kart at your best-known setup and focus entirely on hitting your braking markers, apex points, and throttle application spots lap after lap. This builds the driver consistency that makes your test data meaningful. If your driving varies wildly between runs, you cannot attribute lap time changes to setup with any confidence.
The most productive testing days are organized around a clear agenda. Decide in advance which two or three variables you are evaluating. Run your baseline first to confirm the kart’s behavior matches your notes. Then work through the list, one change at a time, documenting results after each run.
Pro Tip: Dedicate specific days to testing and separate days to lapping. When you try to do both in one session, testing discipline breaks down and you end up learning very little about either your setup or your driving.
Bring a trusted second person to your test days if possible, someone who can time laps, take notes, and call out when your data does not match what you are feeling. Fresh eyes catch things the driver misses.
Adapting to track and weather conditions
Even a perfectly dialed-in setup needs adjustment when conditions shift. Track conditions directly affect tire pressure requirements, ride height choices, and how much chassis flex you want.
On a fresh or “green” track with low grip, you generally want to run lower tire pressures to increase the contact patch, a slightly softer axle to help the kart rotate, and more chassis flex to compensate for reduced mechanical grip. As rubber builds up and the track becomes “rubbered in,” grip increases quickly. That is usually the time to stiffen the setup and raise tire pressures to prevent overheating the tires.
Here is a quick reference for common condition-based adjustments:
- Hot, rubbered-in track: Raise tire pressures, consider stiffer axle, lower ride height slightly.
- Cold or green track: Lower tire pressures, softer axle selection, more chassis flex.
- Wet conditions: Significantly lower tire pressures, raise ride height to increase chassis flex, reduce ballast to lighten the kart.
- High humidity: Watch for carburetor-side richness; jetting may need a slight lean adjustment.
| Condition | Tire Pressure | Axle Stiffness |
|---|---|---|
| Rubbered-in, warm | Higher | Stiffer |
| Green track, cool | Lower | Softer |
| Wet conditions | Significantly lower | Softer |
Log every condition-based change on your setup sheet alongside the date and ambient temperature. Over a full season, those notes become a powerful reference that tells you exactly where to start when you return to a familiar track.
Pro Tip: Check tire temperatures immediately after a session with a pyrometer, reading the inner, middle, and outer tread surfaces. Uneven temperatures tell you more about your setup than lap times alone.
What I have learned from years of structured tuning
I will be honest: for a long time, I thought testing and lapping were the same thing. I would head out, run a bunch of laps, feel something I did not like, make three changes at once, and then wonder why the kart felt worse. Sound familiar? Separating those two activities was the shift that made everything click.
What I have found through experience is that the numeric feel scale sounds unnecessary until you try it. Rating understeer as a 7 out of 10 versus just writing “bad push” gives you something to measure your progress against. When you get it down to a 3 after two adjustments, you know you are moving in the right direction, and you know which change got you there.
The other thing that changed my results was treating the baseline as sacred. I used to think returning to baseline between tests wasted time. In reality, it is what makes your test data trustworthy. Without it, you are comparing apples to something you do not even recognize.
The biggest pitfall I see in other hobbyists is stacking changes out of frustration. A bad practice session turns into four adjustments before the next session, and suddenly no one knows what the kart’s actual behavior is. Discipline in the workflow is what builds confidence, and confidence is what produces consistent race-day results. You can learn more about common tuning pitfalls and how to avoid them in your workflow.
— Mario
Gear up with Gokartsusa for your next tuning session
Whether you are just starting to build your tuning workflow or you are looking to push your setup to the next level, Gokartsusa has the parts, resources, and expertise to back you up.

At Gokartsusa, we stock go-kart components suited for every stage of your tuning process, from chassis hardware to performance-focused accessories. Our blog is packed with guides that complement your workflow, including detailed advice on upgrading your kart’s performance and achieving faster, more consistent laps. If you are expanding your powersports experience beyond go-karting, check out the Mini Sport Kids ATV with remote start, a great entry point for young riders and families looking to keep the adventure going. We are proud to be your pit crew and your parts source. Explore everything we offer at GokartsUSA.biz.
FAQ
What is the first step in a go-kart tuning workflow?
Start by establishing a documented baseline using your chassis manufacturer’s recommended settings, then log every measurement before making any changes. This gives you a known reference point to return to throughout your tuning process.
How many laps should I run when testing a single setup change?
Three to five laps per change is enough to evaluate the effect of one adjustment. Running more laps without returning to baseline can introduce driver fatigue or tire temperature variability that distorts your data.
Why should I separate testing from lapping?
Mixing testing and lapping produces unclear results because you cannot accurately attribute lap time changes to setup adjustments when your driving consistency is also varying. Dedicated testing sessions and dedicated lapping sessions each serve a specific purpose.
When should I use a dyno for engine tuning?
Schedule dyno work when you notice a power loss that does not correlate with chassis changes, or at the start of a season after an engine rebuild. Dyno data on horsepower, torque, and air/fuel ratios gives you a reliable baseline for engine optimization.
How do I adjust my setup for changing track conditions?
Lower tire pressures and soften the axle selection on green or cold tracks to compensate for reduced grip. As the track rubbers in and temperatures rise, raise tire pressures and consider a stiffer axle to prevent tire overheating and maintain control.