


Stock go-karts deliver fun, but most enthusiasts quickly hit performance ceilings. Limited top speed, sluggish acceleration, vague handling, and weak brakes hold you back from truly competitive lap times and thrilling outdoor sessions. Upgrading your kart transforms these frustrations into advantages. This guide walks you through essential modifications covering engine power, chassis geometry, braking systems, and gear ratios. You’ll learn practical steps to boost speed, sharpen cornering, and enhance safety without guesswork or wasted money on ineffective parts.
Table of Contents
- Key takeaways
- Preparing your go-kart for upgrades: tools, parts, and safety checks
- Upgrading your go-kart engine for more power and efficiency
- Enhancing handling and safety through chassis and brake upgrades
- Matching gear ratios and final tuning for optimized kart performance
- Explore go-kart parts and accessories at GoKarts USA®
- How to upgrade go kart: frequently asked questions
Key Takeaways
| Point | Details |
|---|---|
| Power and braking upgrades | Upgrading the engine and braking system yields the largest performance gains and improves safety when chosen with compatible components. |
| Weight distribution matters | Adjusting chassis balance and center of gravity through careful component placement improves cornering grip and reduces lap times. |
| Gear ratio alignment | Select gear ratios that match your engine powerband and track demands to maximize acceleration and top speed through corners. |
| Preparation and safety | Thorough planning, proper tools, and safety checks prevent accidents and costly mistakes during upgrades. |
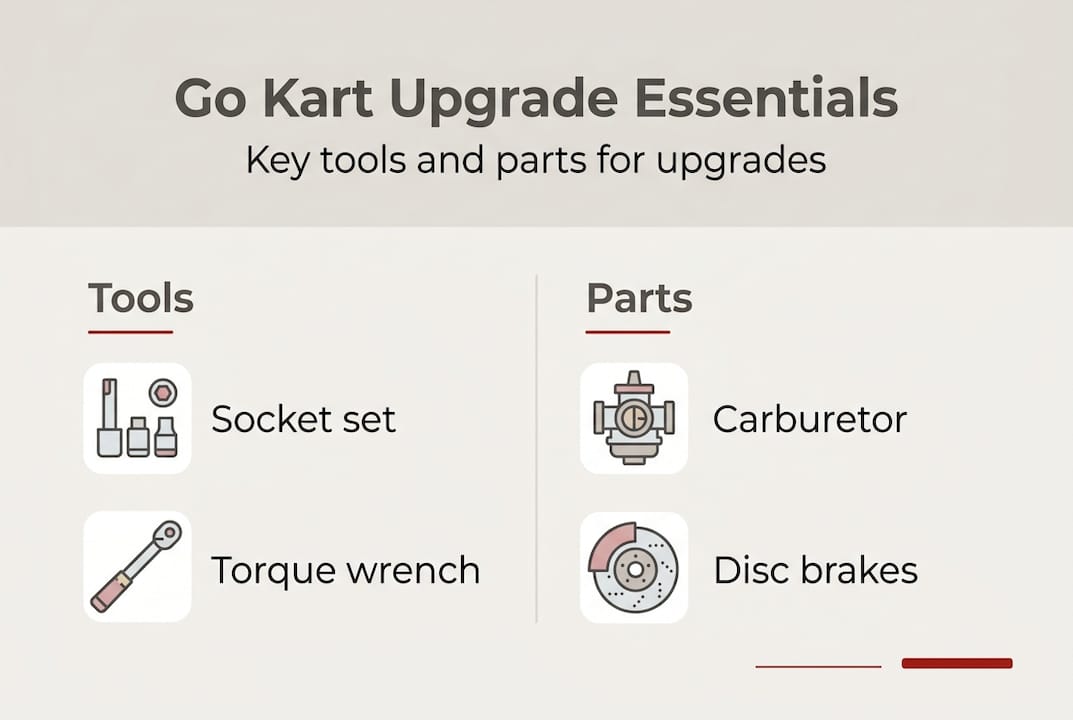
Preparing your go-kart for upgrades: tools, parts, and safety checks
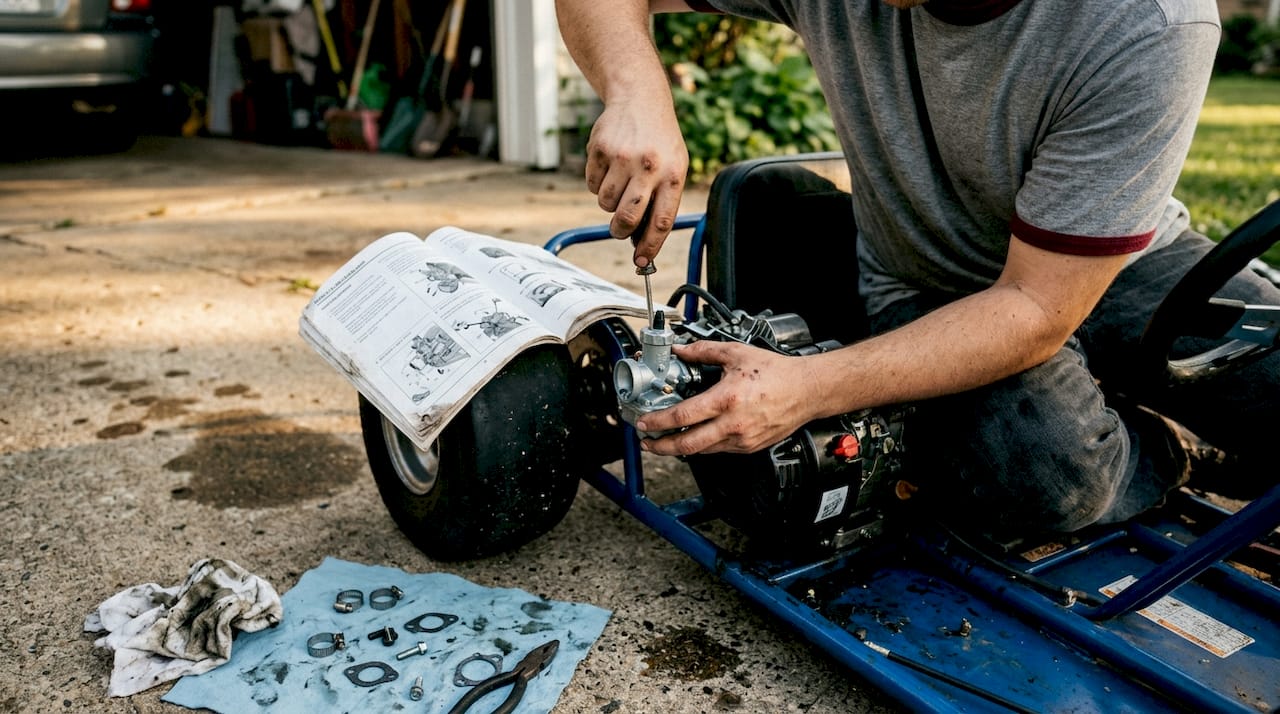
Successful upgrades start with proper preparation. Rushing into modifications without the right tools or parts leads to stripped bolts, misaligned components, and safety hazards. You need a clean workspace, organized tool collection, and verified parts compatibility before touching your kart.
Gather essential hand tools including metric socket sets (8mm to 19mm), combination wrenches, torque wrench, Allen key set, and screwdrivers. Power tools speed up work: impact driver, drill with bits, and angle grinder for custom fabrication. Specialty tools like chain breakers, bearing pullers, and valve spring compressors become necessary for deeper engine work. Keep shop rags, degreaser, and zip ties handy for cleanup and temporary fixes.
Parts selection determines upgrade success. Research compatibility with your specific engine model before ordering. Common 150cc GY6 engine options include 180cc big bore kits, 30mm performance carburetors, racing CDI boxes, and performance exhaust headers. Chassis upgrades require adjustable coilovers, wider axles or narrowing kits, disc brake conversion kits, and ballast weights. Purchase from reputable suppliers who provide installation instructions and technical support.
Safety checks prevent injuries and equipment damage. Inspect frame welds for cracks, especially around engine mounts and steering pivots. Test brake function by checking pad thickness, rotor condition, and hydraulic line integrity. Verify tire pressure and tread depth. Check all fasteners for proper torque, particularly wheel nuts and engine mounting bolts. Wear safety glasses, gloves, and closed-toe shoes during all work.
| Tool/Part Category | Typical Cost | Where to Source |
|---|---|---|
| Hand tool set | $80-$150 | Hardware stores, online retailers |
| Power tools | $120-$300 | Tool suppliers, home improvement centers |
| Big bore engine kit | $180-$350 | Powersports dealers, specialty shops |
| Performance carburetor | $45-$120 | GoKarts USA, scooter parts suppliers |
| Disc brake conversion | $90-$200 | Go-kart retailers, brake specialists |
| Chassis components | $60-$180 | Racing supply stores, fabrication shops |
Pro Tip: Label and photograph every step during disassembly. Use small containers to organize bolts by component. This simple habit saves hours during reassembly and prevents lost hardware.
Upgrading your go-kart engine for more power and efficiency
Engine modifications deliver the most dramatic performance gains. Increasing displacement, improving airflow, and optimizing ignition timing unlock hidden horsepower that stock configurations leave on the table. GY6 engine upgrades include big bore kits for displacement increase, performance carburetors, CVT kits, exhaust modifications, ignition upgrades like CDI boxes, and brake conversions from drum to disc for safety with higher power.
Start with a big bore kit to increase engine displacement. A 150cc engine becomes 180cc or even 232cc with the right cylinder and piston combination. Remove the cylinder head, unbolt the old cylinder, clean gasket surfaces thoroughly, install the new cylinder with supplied gaskets, torque head bolts in a crisscross pattern to manufacturer specifications, and adjust valve clearances. Bigger displacement means more air and fuel per combustion cycle, translating directly to increased power output.
Upgrade to a larger performance carburetor matched to your new displacement. Stock 24mm carburetors choke airflow on modified engines. A 30mm carburetor flows 50% more air, supporting higher RPM and power levels. Remove the old carburetor, install the new unit with proper intake manifold adapters, connect throttle and choke cables, adjust idle mixture screw, and tune main jet size based on spark plug color after test runs. Richer fuel mixtures prevent lean conditions that cause piston seizure.
Install a racing CDI box to advance ignition timing and remove RPM limiters. Stock CDI units cap engine speed at 7500 RPM. Performance CDI boxes allow 9000+ RPM operation with optimized spark advance curves. Locate the CDI under the seat or side panel, unplug the stock unit, plug in the new CDI, and secure it away from heat sources. Higher RPM capability requires valve spring upgrades to prevent valve float at peak engine speeds.
Replace restrictive exhaust systems with performance headers and mufflers. Stock exhausts prioritize noise reduction over flow. Performance exhausts use larger diameter tubing, fewer bends, and high-flow mufflers. Unbolt the old exhaust, install the new header with gaskets, secure mounting brackets, and check for exhaust leaks. Proper exhaust scavenging improves cylinder filling and power across the RPM range.
Upgrade brakes immediately after adding engine power. Faster karts need shorter stopping distances. Convert drum brakes to disc systems for consistent, fade-free braking. Remove wheels, unbolt drum assemblies, install disc brake calipers and rotors, connect hydraulic lines, bleed the system, and adjust brake bias. Disc brakes provide 40% better stopping power and maintain performance during repeated hard braking.
Pro Tip: After installing engine upgrades, retune fuel and ignition settings during break-in. Run five heat cycles with conservative jetting, then gradually lean the mixture while monitoring exhaust gas temperature and spark plug color. This approach maximizes reliability while extracting full performance potential.
Enhancing handling and safety through chassis and brake upgrades
Chassis geometry determines how effectively your kart translates power into lap time. Even massive horsepower gains become useless if poor handling scrubs speed in corners. Strategic chassis modifications improve weight transfer, reduce body roll, and sharpen turn-in response.
Lowering center of gravity to 4.3 inches from 5.5 inches, narrower rear track resulted in 5-8 second lap time improvement on typical 1.7km circuits. Lower CG reduces lateral weight transfer during cornering, keeping more tire contact patch loaded for better grip. Install lowering springs or coilovers to drop ride height by 1-2 inches. Measure from ground to frame rails before and after to verify changes. Avoid excessive lowering that causes bottoming over bumps or reduces suspension travel.
Narrow the rear track width to enhance agility and rotation. Wider rear tracks stabilize straight-line speed but create understeer in tight corners. Reducing rear track from 1090mm to 889mm shifts handling balance toward neutral or slight oversteer. Swap to a shorter rear axle or add spacers to move wheels inboard. Test different widths to find the sweet spot for your driving style and track layout.
| Chassis Parameter | Stock Configuration | Upgraded Configuration | Performance Gain |
|---|---|---|---|
| Center of Gravity Height | 5.5 inches | 4.3 inches | 5-8 second lap time reduction |
| Rear Track Width | 1090mm | 889mm | Improved rotation, reduced understeer |
| Weight Distribution | 38% front / 62% rear | 43% front / 57% rear | Better stability and corner entry |
| Brake Type | Rear drum | Four-wheel disc | 40% shorter stopping distances |
Optimize weight distribution for balanced handling. Optimal weight distribution for LO206: 43% front, 57% rear; low CG ballast under seat for stability. Place ballast low and centered under the seat to minimize CG height while achieving target weight split. Moving weight forward improves front tire grip for sharper turn-in. Moving weight rearward increases rear traction for better acceleration. Adjust incrementally and test lap times to find your ideal setup.
Upgrade to four-wheel disc brakes for maximum stopping power and consistency. Drum brakes fade quickly under repeated hard use. Disc systems maintain performance regardless of temperature. Install calipers, rotors, master cylinder, and hydraulic lines. Bleed the system thoroughly to remove air bubbles. Adjust brake bias to prevent front or rear lockup during threshold braking. Proper brake balance lets you brake later into corners without losing control.
Reinforce chassis mounting points when modifying frame geometry. Cutting or welding frame tubes can weaken structural integrity. Add gussets at stress points, use proper welding techniques, and inspect welds regularly for cracks. A broken frame at speed causes catastrophic crashes. If you lack welding skills, hire a professional fabricator for critical chassis work.
Pro Tip: After chassis modifications, recheck all fasteners after the first test session. Vibration and stress can loosen bolts that seemed tight during assembly. Retorque wheel nuts, suspension bolts, and engine mounts before every race day.
Matching gear ratios and final tuning for optimized kart performance
Gear ratios determine how engine power translates to wheel speed. Wrong ratios leave power on the table or bog the engine below its powerband. Gear ratios must match powerband and track; dyno blueprinting essential for consistency over raw HP. Understanding this relationship separates fast karts from also-rans.
Select gear ratios based on track characteristics and engine powerband. Short tracks with tight corners favor lower ratios for quick acceleration out of turns. Long tracks with high-speed sections need taller ratios to maximize top speed. Calculate gear ratio by dividing rear sprocket teeth by front sprocket teeth. A 75-tooth rear with 12-tooth front yields 6.25:1 ratio. Lower numbers mean higher top speed but slower acceleration. Higher numbers provide quicker acceleration but lower top speed.
Match ratios to your engine’s power curve. Modified engines with big bore kits and performance carburetors produce peak power at higher RPM than stock. Choose ratios that keep engine speed in the meat of the powerband through corner exit and down straights. If your engine makes peak power at 8500 RPM, gear so you hit that speed at the end of the longest straight. Avoid ratios that force upshifts or cause the engine to over-rev beyond its power peak.
Dyno tuning ensures consistent power delivery across the RPM range. Peak horsepower numbers look impressive but mean little if power delivery is peaky or inconsistent. Dyno testing reveals flat spots, lean conditions, and ignition timing issues. A blueprinted engine making 18 horsepower consistently beats a poorly tuned engine with 22 peak horsepower but erratic delivery. Invest in professional dyno time after major modifications.
Avoid these common gear ratio mistakes:
- Gearing too tall for modified engines, causing bogging below powerband
- Ignoring track layout when selecting ratios, optimizing for straights while sacrificing corner exit
- Failing to test multiple ratios, assuming first choice is optimal
- Neglecting to adjust ratios as engine wears and power characteristics change
- Using worn sprockets that skip under load, creating inconsistent power transfer
Expert racers understand that perfect gear ratios represent compromise. You sacrifice some top speed for better acceleration or vice versa. The winning combination depends on track layout, competition, and driving style. Test systematically and log lap times with each change.
Regularly inspect chain and sprocket wear. Stretched chains and worn sprocket teeth waste power and risk breakage. Replace chains every 20 hours of hard use. Swap sprockets when teeth show hooking or sharp edges. Keep the chain properly tensioned and lubricated. A well-maintained drivetrain transfers 95% of engine power to the rear wheels. Neglected drivetrains lose 15-20% to friction and slippage.
Pro Tip: Carry multiple sprocket sizes to race events. Track conditions change with weather and rubber buildup. Having 11, 12, and 13-tooth front sprockets lets you fine-tune gearing between practice and race sessions without returning to the shop.
Explore go-kart parts and accessories at GoKarts USA®
Upgrading your go-kart requires quality parts from reliable sources. GoKarts USA® offers comprehensive selections of performance components including engines, carburetors, brake systems, and chassis parts designed for recreational and competitive use. Whether you need a complete kids ATV 110cc gas engine for family projects or a Storm 200cc minibike for trail riding, the online catalog provides detailed specifications and competitive pricing.

Browse the GoKarts USA homepage to discover current promotions on performance upgrades and accessories. Expert support staff help match parts to your specific kart model, ensuring compatibility and optimal results. Convenient shipping options deliver parts directly to your door, letting you focus on installation rather than parts hunting. Quality assurance and customer satisfaction drive every transaction, building trust within the powersports community.
How to upgrade go kart: frequently asked questions
What are the safest engine upgrades for beginners?
Start with bolt-on modifications like performance air filters, exhaust systems, and CDI boxes that don’t require engine disassembly. These upgrades provide noticeable power gains without risking internal engine damage from improper installation. Always upgrade brakes simultaneously when adding power to maintain safe stopping distances.
How much does a typical go-kart upgrade cost?
Basic upgrades including carburetor, exhaust, and CDI box run $200-$400 total. Comprehensive builds with big bore kits, chassis modifications, and brake upgrades cost $800-$1500 depending on parts quality and labor. Budget an additional 20% for unexpected issues and replacement consumables during installation.
Can I upgrade my go-kart without professional help?
Most bolt-on upgrades require only basic mechanical skills and hand tools. Engine rebuilds involving cylinder replacement and valve work demand more expertise but remain achievable with service manuals and patience. Chassis welding and fabrication should be left to professionals unless you have certified welding skills and proper equipment.
What maintenance is required after upgrades?
Modified engines need more frequent oil changes, typically every 10-15 hours versus 20-25 hours for stock engines. Check valve clearances every 20 hours. Inspect chain tension, sprocket wear, and brake pad thickness before each session. Retorque all fasteners after the first 5 hours of operation following major modifications.
How do brake upgrades improve safety?
Disc brakes provide consistent stopping power regardless of heat buildup from repeated use. Drum brakes fade quickly during aggressive riding, extending stopping distances dangerously. Disc systems also offer better modulation, letting you threshold brake without locking wheels. Four-wheel disc setups reduce stopping distances by 40% compared to rear-only drum configurations.
Do I need to retune after installing a big bore kit?
Absolutely. Increased displacement requires richer fuel mixture and adjusted ignition timing. Start with larger main jets and work down while monitoring spark plug color. Run several heat cycles at moderate throttle before full-power testing. Proper break-in and tuning prevent piston seizure and ensure long engine life.