


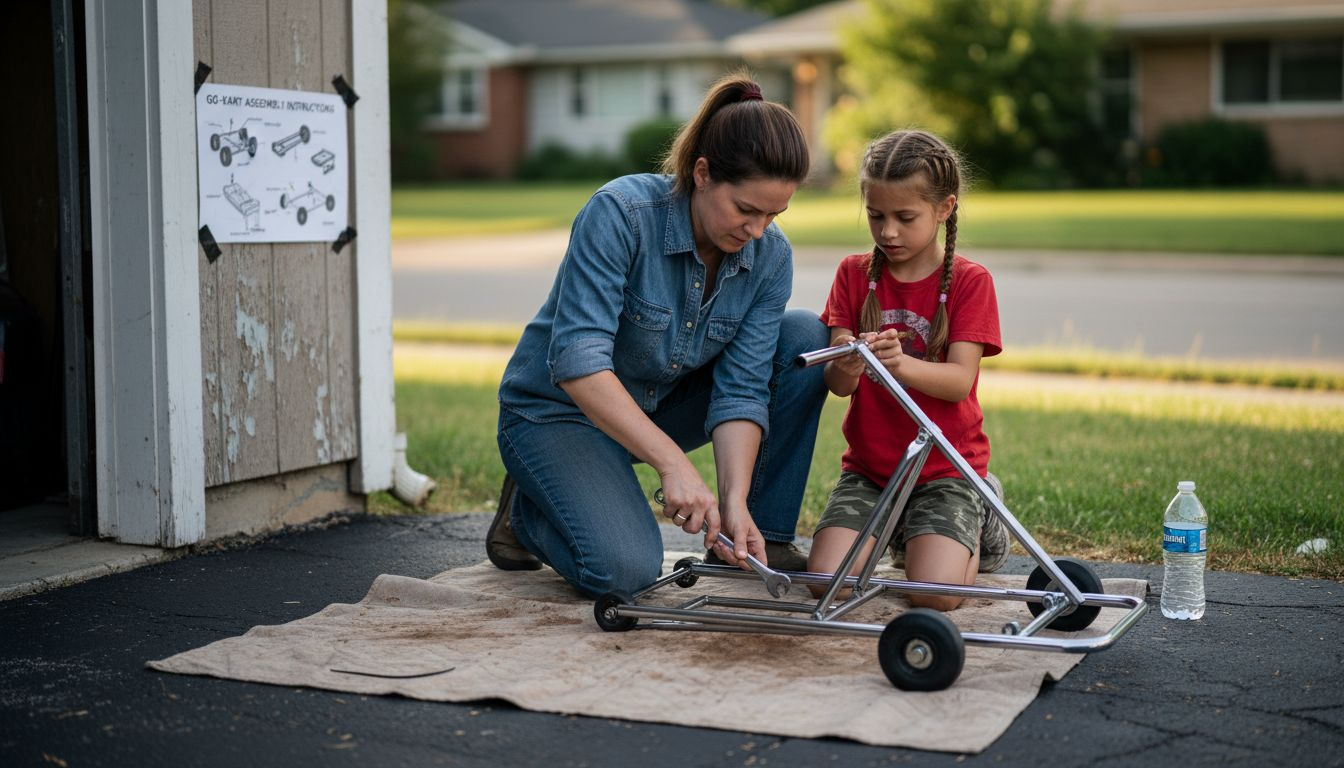
Every parent faces that moment when a simple weekend project turns into a search for missing parts and last-minute store runs. Building a safe and affordable go-kart for your child can feel overwhelming, especially if it is your first time handling mechanical assemblies. By focusing on gathering every component before assembly, you create a safer workspace and set up your child’s go-kart for reliable fun from the very start.
Table of Contents
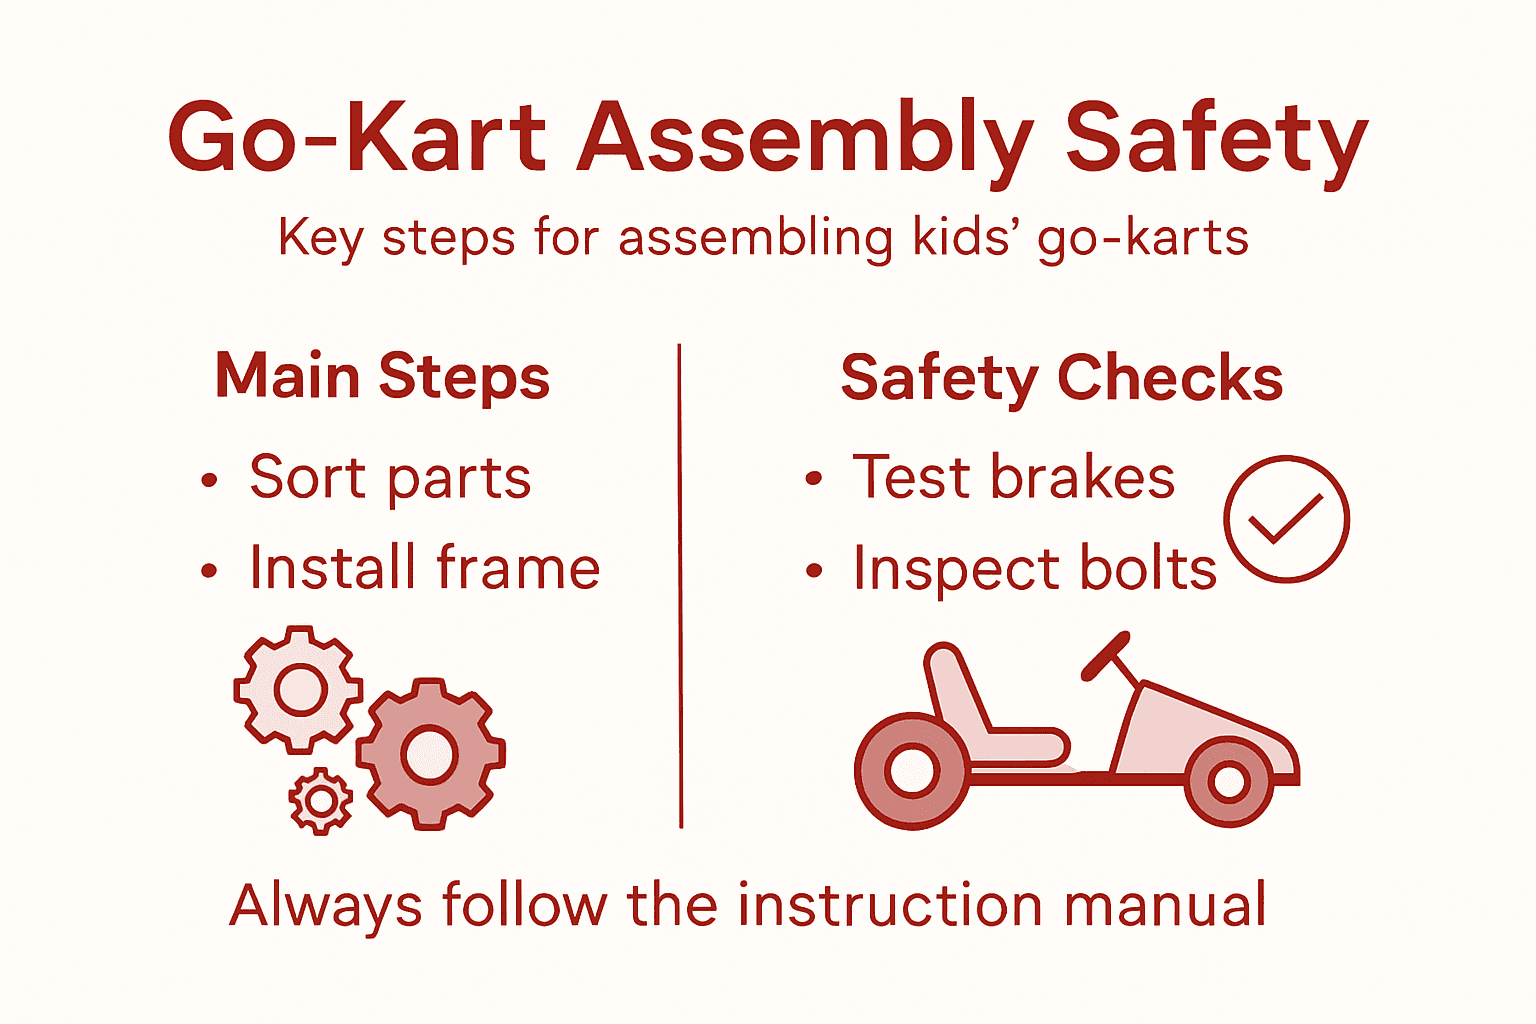
- Step 1: Gather and Organize All Go-Kart Parts
- Step 2: Install the Frame and Key Safety Components
- Step 3: Attach the Wheels, Steering, and Braking System
- Step 4: Secure the Engine and Connect Power Elements
- Step 5: Test and Verify All Assembled Components
Quick Summary
| Key Point | Explanation |
|---|---|
| 1. Organize parts before assembly | Gather and categorize all go-kart components to prevent delays and frustration during assembly. |
| 2. Secure the frame and safety components | Properly install the frame and safety features to ensure structural integrity and child safety. |
| 3. Test all systems thoroughly | Conduct static and dynamic tests to verify that every component functions correctly and safely. |
| 4. Label wiring and connections | Use labels on wires and fuel lines for easier troubleshooting and maintenance in the future. |
| 5. Follow manual guidelines closely | Consulting the manual ensures correct installation and alignment of all parts, enhancing performance. |
Step 1: Gather and organize all go-kart parts
Before you touch a single bolt, take time to gather every component your go-kart needs. This upfront work prevents frustrating stops mid-assembly when you realize you’re missing something critical. A organized approach transforms assembly from chaotic to smooth.
Start by unpacking your go-kart completely and laying out all parts in a clean, dry workspace. Check your parts list or manual against what you’ve received. Your go-kart likely arrives with the chassis, engine, steering system, brakes, and wheels as major assemblies, plus hardware like bolts, nuts, and fasteners.
Create distinct piles for each category:
- Frame and chassis components in one area
- Engine and fuel system parts grouped together
- Steering and suspension pieces in their own section
- Brake components separated from other systems
- Wheels, tires, and axles in one spot
- Fasteners and hardware in a labeled container with smaller compartments
Small bolts, washers, and clips disappear easily, so use a storage organizer with multiple compartments or small bags labeled by size and purpose. This prevents the “where did that bolt go?” panic at 2 a.m.
Verify that all major assemblies are present and undamaged before organizing. Check for cracks in the frame, bent wheels, or damaged engine components. Taking photos of your organized layout helps you remember where everything belongs later.
Organizing your parts before assembly saves hours of frustration and prevents lost fasteners that could compromise your child’s safety.
Once everything is sorted and verified, you’re ready to move forward with confidence. This groundwork makes the actual assembly process straightforward and enjoyable for both you and your child.
Here’s a quick summary of common go-kart parts and why proper organization matters:
| Part Category | Importance of Organization | Typical Issue if Misplaced |
|---|---|---|
| Frame & Chassis | Ensures foundational strength | Assembly delays, structural issues |
| Engine & Fuel System | Drives performance & longevity | Operational failures, leaks |
| Steering & Suspension | Directly affects handling | Steering imprecision, unsafe ride |
| Brake Components | Critical for rider safety | Incomplete stops, safety hazards |
| Wheels, Tires, & Axles | Necessary for mobility | Imbalance, misalignment |
| Fasteners & Hardware | Secures every component | Parts loosening, component loss |
Pro tip: Take a clear photo of your organized parts layout before you start assembling, then refer back to it if you need to confirm where specific components belong or if you get interrupted mid-build.
Step 2: Install the frame and key safety components
The frame is your go-kart’s backbone and the foundation for every safety feature your child depends on. Getting this right means your kart handles well, stays structurally sound, and protects your child during use. This step demands attention to detail and patience.
Start by laying out your frame components on a flat, level surface. Your go-kart’s frame likely consists of steel tubing that forms the main chassis, designed to distribute stress evenly. Before bolting anything down, verify that all frame pieces align properly and there are no bends or cracks from shipping.
Install the frame following your manual’s sequence. Begin by securing the main frame rails at their connection points using the bolts provided. Use a torque wrench if your manual specifies torque values, as over-tightening can strip threads while under-tightening creates safety risks.
Next, install the seat mounting brackets and secure the driver’s seat firmly to the frame. The seat position affects weight distribution and steering response, so ensure it’s positioned exactly as your manual indicates. A properly mounted seat keeps your child safe and comfortable during rides.
Install the roll cage and safety frame components according to your manual’s specifications. These elements are critical for collision protection. Bolt them securely, checking that welds or joints show no visible cracks or separation.
Ensure your frame sits level and square before final tightening. Check diagonal measurements from corner to corner to confirm the frame isn’t twisted. A twisted frame causes steering problems and uneven wear on tires.
Install mounting provisions for the steering column and brake pedal assembly. These must be rock solid with no flex or movement. Test each bolted connection by hand before moving to the next component.
A properly installed frame with secure safety components is non-negotiable for your child’s protection on every ride.
Once the frame and all safety components are installed and verified tight, you’re ready to attach the engine and steering systems.
Pro tip: Double-check every bolt connection with your wrench before moving to the next step; loose fasteners can vibrate free during operation, creating serious safety hazards.
Step 3: Attach the wheels, steering, and braking system
You’re now at the stage where your go-kart transforms from a frame into a functioning vehicle. Installing wheels, steering, and brakes requires precision and care since these systems directly control how your child drives and stops. Take your time here and verify every connection.
Begin with the wheel installation. Slide the wheel hub onto the axle and secure it with the provided bolts or nuts. Hand-tighten first, then use a wrench to firmly secure each wheel. Spin each wheel to confirm it rotates freely without rubbing against the frame.
Next, assemble the steering system using your manual as a guide. The steering components work together as an integrated system:
- Mount the steering column securely to the frame
- Attach the steering wheel to the column
- Connect the rack and pinion or steering linkage
- Install tie rods and stub axles for responsive turning
Proper Ackermann steering geometry/1488271356_28-02-2017.pdf) ensures even tire wear and smooth handling during turns. Check that the steering wheel moves freely through its full range without binding or sticking. Test the wheels to confirm they turn correctly when you rotate the steering wheel.
Now install the braking system, which is critical for safety. Most go-karts use hydraulic disc brakes mounted on the rear axle. Position the brake calipers and secure them firmly to the frame. Connect the brake lines and master cylinder according to your manual, ensuring no kinks or damage to the lines.
Bleed air from the brake lines by pressing the brake pedal repeatedly until the response feels firm and responsive. The pedal should not feel spongy or soft. Test brake operation by hand to confirm the calipers engage and release smoothly.
Your braking system must be absolutely reliable before your child ever gets behind the wheel.
Once wheels spin freely, steering operates smoothly, and brakes respond firmly, you’re ready to attach the engine and fuel system.
Pro tip: Keep a small notebook nearby to write down which bolts go where and their tightness as you work; this reference proves invaluable if you need to adjust anything later or troubleshoot handling issues.
Step 4: Secure the engine and connect power elements
Your engine is the heart of the go-kart, and how you mount it determines performance, safety, and longevity. Proper engine installation keeps vibrations minimal, protects other systems, and ensures reliable operation. This step requires methodical work and careful attention to every connection.
Position the engine on the frame near the center of gravity, following your manual’s specifications. The engine should sit low and centered between the driver and rear axle for balanced weight distribution. This positioning improves handling and prevents the kart from feeling top-heavy or unstable.
Secure the engine to its mounting brackets using bolts and vibration-dampening mounts. These mounts absorb engine vibrations and prevent them from transferring to the frame. Hand-tighten all bolts first, then use a wrench to bring them to the torque specifications listed in your manual.
Now connect the power elements that make the engine run. This includes several critical systems:
- Attach the fuel line from the tank to the carburetor
- Connect the spark plug wire to the spark plug
- Wire the ignition switch and kill switch circuits
- Install the throttle linkage from the pedal to the carburetor
- Connect any electrical ground wires to the frame
Route all wiring and fuel lines carefully to avoid moving parts like pulleys, belts, or wheels. Secure them with cable ties or clips so they cannot vibrate loose or contact hot engine surfaces. Before starting a new engine, verify every connection is tight and properly positioned.
Proper engine mounting and power integration ensure minimal vibrations and reliable operation during riding. Double-check that the throttle responds smoothly when you pull the pedal and that the kill switch cuts engine power immediately.
Verify fuel flows freely through the lines and that the engine receives electrical current when the ignition is turned on. Test all connections by hand to confirm nothing moves or flexes.
A securely mounted engine with properly connected power elements prevents dangerous failures while your child is riding.
Once the engine is solid and all power connections verified, your go-kart is nearly complete and ready for final safety checks.
Pro tip: Label every wire and fuel line with tape as you connect it; this simple step saves hours of troubleshooting if you ever need to disconnect and reconnect the engine for maintenance.
Step 5: Test and verify all assembled components
Before your child ever sits in the go-kart, you need to verify that every system works correctly and safely. Testing is not optional—it’s your final defense against dangerous failures. This methodical approach catches problems before they become safety issues.
Start with a static inspection where nothing moves or runs. Walk around the kart and visually inspect every bolt, bracket, and connection. Tighten anything that feels loose by hand, paying special attention to the frame, engine mounts, and steering connections.
Check all fasteners using your wrench. Go through each bolt systematically and verify it matches the torque specification in your manual. A loose bolt can vibrate free during operation, potentially causing the wheel to fall off or the engine to shift.
Verify wheel alignment and steering geometry:
- Roll the kart forward in a straight line and confirm wheels track evenly
- Turn the steering wheel fully left and right to ensure smooth operation
- Check that both wheels turn equally when steering
- Spin each wheel by hand to confirm they rotate freely without rubbing
Test the braking system without the engine running. Press the brake pedal and verify it feels firm and responsive, not spongy or soft. The pedal should stop about an inch from the floor. Spin each wheel by hand to confirm the brakes engage and hold the wheel in place.
Comprehensive testing of all systems ensures safety and reliability before operation. With the engine off, work the throttle and confirm the linkage responds smoothly from idle to full throttle without sticking.
Now start the engine in a controlled setting, ideally in your driveway or a safe area away from obstacles. Let it idle and listen for unusual sounds or vibrations. Check that the kill switch stops the engine immediately when pressed.
Conduct a short test drive at low speed in a safe, empty area. Accelerate gently, test the steering response, and apply the brakes several times. Listen and feel for any unusual vibrations, noises, or handling problems.
Never let your child ride the kart until you’ve personally verified every system operates correctly and safely.
If you discover any problems during testing, stop immediately and address them before allowing anyone to ride.
The table below compares key system checks during testing and their safety impact:
| System Tested | How to Check | Why It Matters |
|---|---|---|
| Frame & Bolts | Visual and torque check | Prevents structure failure |
| Steering System | Full range movement test | Ensures predictable control |
| Wheels & Axles | Spin and alignment check | Avoids excessive tire wear |
| Braking System | Pedal and caliper response | Guarantees reliable stopping |
| Engine & Power | Idle and throttle test | Confirms consistent operation |
| Safety Switches | Kill switch activation | Immediate engine shutdown |
Pro tip: Keep a checklist of all systems to test and mark them off as you go; this prevents accidentally skipping important checks and gives you confidence that nothing was overlooked.
Ensure Safe and Easy Go-Kart Assembly with Expert-Approved Parts and Gear
Assembling a go-kart for your child can be rewarding yet challenging with so many critical components like the frame, steering, braking, and engine requiring precise installation and safety checks. At GokartsUSA.biz, we understand the importance of quality, reliable parts and accessories that make your assembly process smoother and your child’s ride safer. Avoid frustrating delays from missing fasteners or incompatible systems by sourcing everything you need from a trusted supplier committed to safety and performance.

Explore our wide selection of kid-friendly go-karts, essential hardware, and protective gear that meet stringent safety standards. With special offers like free shipping and complimentary helmets, now is the perfect time to secure the perfect go-kart and accessories to match the expert assembly steps you just learned. Take the next step toward your child’s safe outdoor fun by visiting GokartsUSA.biz today. Discover dependable products designed to support every part of your safe assembly journey and give your family peace of mind.
Frequently Asked Questions
How do I gather and organize all go-kart parts before assembly?
Gather all go-kart parts by unpacking the kit in a clean workspace and laying out every component. Create distinct piles for categories like frame, engine, steering, brakes, and wheels to simplify the assembly process and avoid losing small fasteners.
What are the key safety components to install on a go-kart for kids?
The key safety components include the frame, seat mounting brackets, roll cage, and brake system. Ensure each of these elements is securely installed according to the manual to provide a safe driving experience for your child.
How can I ensure the steering and braking systems are installed correctly?
Install the steering system by following the manual to connect the steering column, wheel, and linkage. For the braking system, ensure the brake calipers and lines are properly mounted and bled, verifying that the brake pedal feels firm and responds reliably.
What should I check during the final system tests before allowing my child to ride?
Conduct a static inspection to ensure all bolts are tight, then test the steering and braking systems for responsiveness. Finally, perform a short test drive in a safe area to confirm the kart handles properly without unusual vibrations or noises before allowing your child to ride.
Why is it important to position the engine correctly in the go-kart?
Properly positioning the engine near the center of gravity helps maintain balance and stability while driving. Position the engine low and centered to improve handling and avoid a top-heavy feel that could compromise safety during use.
What are effective tips for organizing small fasteners during the go-kart assembly?
Use a storage organizer with multiple compartments or smaller bags labeled by size and purpose for small fasteners. This organization strategy helps prevent confusion and ensures you can find the right bolt or washer quickly throughout the assembly process.
Recommended
- 7 Must-Have Go-Kart Accessories for Safe Family Fun – GoKarts USA®
- What Is a Go-Kart and Why Safety Matters Most – GoKarts USA®
- Beginner’s Guide Go Karting: Safe Entry-Level Fun for Kids – GoKarts USA®
- How to Choose Go-Kart for Kids: Safe Buying Guide – GoKarts USA®
- NEVO Electric Golf Carts Landing Page Example - Swyft Interactive