


TL;DR:
- Most mini bike problems are fixable with proper diagnosis, tools, and patience.
- Systematic checks of fuel, spark, electrical, and drive components prevent unnecessary repairs.
- Consistent maintenance and careful troubleshooting ensure safe, reliable riding experiences.
You’re geared up, the sun is out, and your mini bike refuses to start. That sinking feeling is something every rider knows. Whether it’s a sudden power loss mid-ride or a grinding noise that wasn’t there yesterday, mini bike problems always seem to show up at the worst time. The good news is that most common issues are completely fixable with the right approach and a little patience. This guide walks you through diagnosing and solving the most frequent mini bike problems, from engine faults to electrical gremlins to drive issues, so you can get back to the thrill of riding safely and confidently.
Table of Contents
- Gathering tools and safety preparation
- Diagnosing common engine problems
- Troubleshooting the electrical system
- Fixing drive and control issues
- Verifying repairs and preventing future issues
- The real secret to reliable mini bike troubleshooting
- Upgrade your mini bike experience with quality parts and support
- Frequently asked questions
Key Takeaways
| Point | Details |
|---|---|
| Start with safety | Gather the right tools and set up a safe workspace before troubleshooting your mini bike. |
| Diagnose step-by-step | Follow a systematic approach, starting with engine and electrical basics, to identify the root cause. |
| Address common problems | Fuel, spark, and chain issues cause most mini bike troubles and are usually easy to fix with simple checks. |
| Verify and maintain | Always test your repairs and create a routine inspection plan to prevent future breakdowns. |
| Care beats cost | Thorough, careful troubleshooting often prevents unnecessary expenses and keeps your mini bike running strong. |
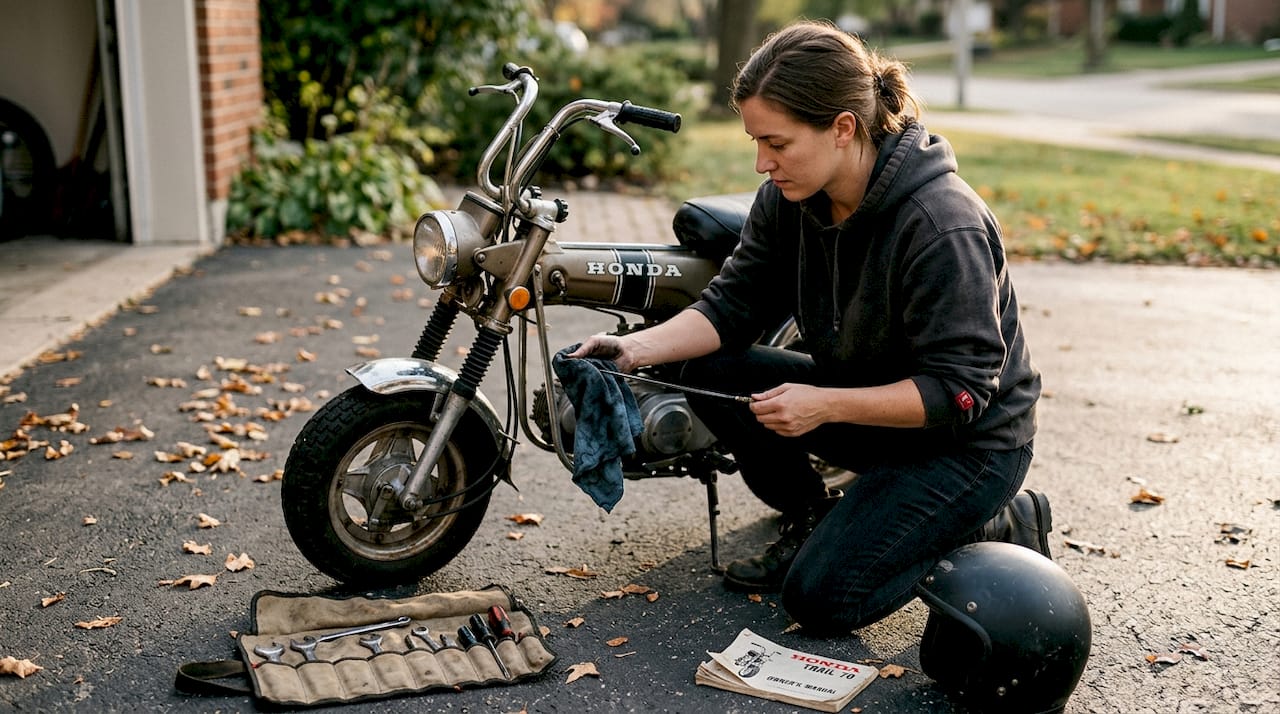
Gathering tools and safety preparation
Now that you know what to expect from this guide, let’s start by setting yourself up for success. Jumping straight into troubleshooting without the right tools or safety gear is a shortcut to frustration and potential injury. A few minutes of preparation makes every repair faster, safer, and more effective.
Here’s what you need before you touch anything on your mini bike:
- Socket set and wrenches for removing covers, bolts, and engine components
- Spark plug wrench specifically sized for your mini bike’s plug
- Multimeter for testing battery voltage and electrical connections
- Flathead and Phillips screwdrivers for panels and adjustment screws
- Pliers and wire cutters for cable and wiring work
- Tire pressure gauge to check inflation quickly
- Safety gloves and goggles to protect your hands and eyes
- Chain lubricant and clean rags for drive system maintenance
| Tool or Gear | Purpose |
|---|---|
| Socket set | Removing bolts and engine covers |
| Spark plug wrench | Inspecting and replacing spark plugs |
| Multimeter | Testing voltage, continuity, and connections |
| Safety gloves | Hand protection from sharp edges and fluids |
| Goggles | Eye protection from debris and sprays |
| Tire pressure gauge | Verifying safe tire inflation |
| Chain lubricant | Reducing friction and wear on the drive chain |
Your workspace matters just as much as your tools. Work on a flat, stable surface with good lighting. Make sure there’s plenty of ventilation if you’re indoors, because fuel vapors are no joke. Always let the engine cool completely before you start working. A hot engine isn’t just uncomfortable to touch; it’s genuinely dangerous.
Safety first: Never work on a running engine or attempt repairs immediately after riding. Give your mini bike at least 20 to 30 minutes to cool down before you begin any inspection.
For a solid foundation before you start wrenching, review our safe mini bike setup guide to make sure your bike is configured correctly from the start.
Pro Tip: Lay out all your tools on a clean mat before you begin. Knowing exactly where everything is saves time and prevents the frustration of hunting for a wrench mid-repair.
Diagnosing common engine problems
With your tools ready and safety gear on, it’s time to dive into the most common cause of mini bike problems: engine issues. The engine is the heart of your ride, and when it misbehaves, the whole adventure stops. The key is working through a logical sequence rather than guessing.
Follow these steps to systematically diagnose your engine:
- Check the fuel level. It sounds obvious, but an empty tank or a clogged fuel line is the number one starting problem. Inspect the fuel line for kinks or blockages and consider whether you need to replace mini bike gas cap if the vent is blocked.
- Inspect the air filter. A clogged air filter starves the engine of oxygen. Remove it and hold it up to the light. If it’s dark and dirty, clean or replace it.
- Check the spark plug. Pull the plug and look for fouling, cracks, or heavy carbon buildup. A healthy plug has a light tan or gray electrode. A black, wet, or cracked plug needs replacing.
- Test for spark. Reconnect the plug to its wire, ground the plug against the engine block, and crank the engine. You should see a strong blue spark. A weak orange spark or none at all points to ignition problems.
- Listen for unusual sounds. Knocking, rattling, or a rough idle often signals carburetor issues or low engine oil.
Common symptoms and what they usually mean:
- Won’t start: Check fuel, spark plug, and choke position first
- Loss of power: Dirty air filter, old fuel, or a partially blocked carburetor jet
- Rough idling: Carburetor needs cleaning or the idle screw needs adjustment
Proper maintenance can cut common mini bike risks by 50% and improve safety, which is why staying on top of these checks matters so much. Our mini bike maintenance tips cover a full routine to keep your engine healthy. You’ll also find helpful engine starting tips and mini bike safety strategies to round out your knowledge.
Pro Tip: Always use fresh fuel. Gasoline degrades in as little as 30 days and can gum up your carburetor fast. If your mini bike has been sitting, drain the old fuel before troubleshooting anything else.
Troubleshooting the electrical system
Once the engine checks out, electrical gremlins are the next most likely culprit. Electrical faults are tricky because they’re invisible, but they follow predictable patterns once you know what to look for.
Classic electrical faults in mini bikes include:
- Dead or weak battery causing no starter response
- Loose or corroded wire connections leading to intermittent running
- Blown fuse cutting power to the ignition or starter
- Faulty kill switch that stays in the off position
- Bad starter motor that clicks but won’t turn the engine over
| Symptom | Likely Cause | Quick Fix |
|---|---|---|
| No starter response | Dead battery or blown fuse | Charge battery, check and replace fuse |
| Intermittent running | Loose wire connection | Trace and secure all connections |
| No dashboard lights | Blown fuse or dead battery | Test battery voltage, inspect fuse box |
| Engine cranks but won’t fire | Faulty ignition switch | Test switch continuity with multimeter |
| Starter clicks once | Weak battery or bad ground | Charge battery, clean ground connection |
Your multimeter is your best friend here. Set it to DC voltage and test the battery first. A fully charged 12V battery should read between 12.6 and 12.8 volts. Anything below 12 volts means it needs charging or replacement. For continuity checks on switches and fuses, switch your multimeter to the continuity setting and listen for the beep.
Careful diagnosis of electrical issues prevents unnecessary part replacements and saves money, which is why we always recommend testing before buying new parts. Our electrical troubleshooting tips and mini bike wiring setup resources are great companions for this process. If you’re newer to mini bikes, our mini bike beginner guide also explains the basics of how these systems work together.
Pro Tip: Always start at the battery and work outward when tracing electrical faults. Follow the circuit from power source to component rather than randomly checking wires. This systematic approach cuts diagnostic time in half.
Fixing drive and control issues
With the engine and electrical systems working, the last pieces to check are the parts that connect your power to the ground and stop you safely. Drive and control problems are often the most noticeable because they affect how the bike feels under you.
Here’s how to check each system step by step:
- Inspect the chain. Look for slack, rust, or visible wear. Loose or misaligned chains are a top cause of drive problems in mini bikes. The chain should have about half an inch of vertical play at its midpoint.
- Check chain alignment. Look from behind the bike to make sure the rear sprocket and front sprocket are perfectly in line. Misalignment causes rapid wear and slipping.
- Test the brakes. Squeeze each brake lever firmly. It should engage before the lever reaches the handlebar. If it feels spongy or travels too far, the cable needs adjustment or the pads need replacing.
- Inspect the throttle cable. The throttle should snap back instantly when released. Any stickiness or delay means the cable is kinked, frayed, or needs lubrication.
- Check tire pressure. Under-inflated tires reduce control and increase rolling resistance. Check your owner’s manual for the correct PSI and inflate accordingly.
Simple fixes you can handle right now:
- Chain too loose: Use the rear axle adjuster bolts to increase tension evenly on both sides
- Brakes feel weak: Tighten the brake cable adjuster at the lever and re-test
- Tires low: Inflate to the recommended PSI and recheck after a short ride
- Throttle sticky: Apply a small amount of cable lubricant and work the throttle through its full range
For a deeper look at how these controls work together, our essential controls check resource walks through every component in detail.
Critical safety reminder: Always test your brakes and throttle response at low speed in a safe area after any adjustment before returning to normal riding. Never assume a repair is complete until you’ve verified it under real conditions.
Verifying repairs and preventing future issues
Before taking your mini bike back out for fun, it’s smart to double-check that every fix sticks and prevent new problems from cropping up. A quick post-repair verification routine protects both you and your bike.
Run through these checks before every ride after a repair:
- Visual inspection: Look for any loose bolts, disconnected wires, or leaking fluids
- Start-up check: Let the engine idle for two to three minutes and listen for unusual sounds
- Controls test: Verify throttle snaps back, both brakes engage firmly, and the kill switch works
- Low-speed ride test: Ride slowly in a safe area and check for vibrations, pulling, or hesitation
- Re-inspection: After the test ride, check the chain tension and brake feel again
Consistent maintenance is the most effective way to avoid recurring mini bike problems. Building a simple routine around your routine mini bike checks keeps small issues from becoming expensive repairs.

A monthly maintenance schedule should include checking the oil level, cleaning the air filter, inspecting the chain, and verifying tire pressure. After heavy riding sessions, add a brake pad inspection and a full bolt check to your routine.
Pro Tip: Keep a small troubleshooting logbook for your mini bike. Write down the date, the symptom you noticed, what you checked, and what you fixed. Over time, this log reveals patterns, like a chain that needs tensioning every three weeks, and helps you stay ahead of problems before they stop your ride.
The real secret to reliable mini bike troubleshooting
Having covered the technical steps, here’s a lesson learned from years around mini bikes: the biggest mistake riders make isn’t a lack of tools or knowledge. It’s rushing.
When something goes wrong, the instinct is to fix it fast and get back to riding. We get it. But rushing through a diagnosis means skipping steps, misidentifying the real problem, and sometimes making things worse. We’ve seen riders replace expensive parts that didn’t need replacing simply because they didn’t slow down to test the obvious things first.
A repeatable checklist, like the one in this guide, removes the guesswork. It keeps you calm and focused even when frustration creeps in. Even the most experienced riders benefit from working through a methodical process rather than relying on gut instinct alone.
The mindset that works: Measure twice, fix once. Slow troubleshooting is always faster than fixing the same problem twice.
Our expert maintenance tips reinforce this approach with practical routines you can build into every riding season. Patience isn’t just a virtue here. It’s the most reliable tool in your kit.
Upgrade your mini bike experience with quality parts and support
If you want to keep your mini bike running smoothly or need reliable parts, here’s where to look next. At GoKarts USA®, we stock everything from replacement components to full upgrades, so you never have to compromise on reliability or safety.

Whether you’re outfitting a new rider with a Mini Sport Kids ATV or tracking down specific replacement hardware like Pocket Bike Footpegs, our catalog is built for riders who take their machines seriously. We’re your pit crew and fellow enthusiasts, committed to fueling your adventure with quality products, honest guidance, and the kind of support that keeps you riding season after season. Explore our full range today and discover why thousands of riders trust GoKarts USA® for every powersports need.
Frequently asked questions
What is the most common reason a mini bike won’t start?
Empty fuel, spark plug failure, and electrical issues are the most frequent starting problems. Begin your diagnosis by checking fuel level, spark plug condition, and key electrical connections before anything else.
How can I tell if my mini bike problem is electrical or mechanical?
Electrical and mechanical failures have distinct symptoms that make them easier to separate. Electrical faults typically produce no starter response or flickering lights, while mechanical issues show up as noises, stalls, or power loss under load.
How often should I perform maintenance to prevent mini bike breakdowns?
Frequent maintenance greatly reduces the risk of breakdowns. Run basic safety and performance checks before each ride, and schedule a more thorough inspection every month or after any heavy riding session.
Is there a way to avoid costly part replacements when troubleshooting?
Yes. Careful step-by-step diagnosis saves money on unnecessary replacements. Always verify the root cause with simple fuel, spark, and voltage tests before purchasing any new components.