




A starter kit for youth riders is a bundled package of protective gear, typically a certified helmet, gloves, boots, eye protection, riding apparel, and basic body armor, matched together for a beginner rider’s size and vehicle type. It exists to solve one problem every parent runs into: buying gear piece by piece almost always leads to something that doesn’t fit right or doesn’t work with the rest of the setup. The immediate next step, before you shop for anything else, is simple: measure your child’s head and start with a DOT or Snell-certified helmet.
We’ve watched a lot of families walk into their first season of riding, and the ones who start with a fitted, certified helmet and build out from there almost always end up happier with their gear. The Droyd gear guide lays out key categories every young rider needs: helmet, goggles, gloves, boots, body protection, and riding apparel. Bundled kits exist precisely because getting all six to work together, especially fit, is harder than it sounds.
Here’s what to check before you buy anything:
- Confirm the helmet carries a DOT or Snell certification sticker inside the shell.
- Measure head circumference with a soft tape, not a guess based on age.
- Check that goggles seal fully against the helmet’s eye port with no gap.
- Look for a size chart on the retailer’s product page, not just “youth medium.”
Pro Tip: Measure your child’s head first, then shop for a helmet that fits that number. Buying the helmet last, after picking out a “cool” jacket or gloves, is how most kits end up mismatched.
Key Takeaways
A youth starter kit bundles a certified helmet with gloves, boots, eye protection, apparel, and armor sized to work together, and starting with helmet fit protects riders best.
| Point | Details |
|---|---|
| Helmet comes first | Measure head circumference and confirm DOT or Snell certification before buying anything else. |
| Match certification to vehicle | Motorized youth vehicles need DOT/Snell helmets, not bicycle helmets or equestrian-rated gear. |
| Fit test every piece | Check goggle seal, glove dexterity, and boot ankle support before your child ever rides. |
| Replace after impact | Swap a helmet immediately after any hard hit, even without visible cracks, and every five years regardless. |
| Consider a bundled kit | Gokartsusa pairs youth vehicles with matched gear bundles to reduce sizing and compatibility guesswork. |
Table of Contents
- What Is a Starter Kit for Youth Riders Made Of?
- How Do You Choose and Fit a Youth Riding Kit?
- Which Safety Certifications Should Parents Verify?
- Should You Buy a Bundled Kit or Individual Pieces?
- What Should You Expect to Pay, and Where Should You Shop?
- How Do You Maintain and Replace Starter Kit Gear?
- Why We Recommend Starting With a Bundled Kit
- Where to Find a Starter Kit for Your Young Rider
- Frequently Asked Questions
- Sources
What Is a Starter Kit for Youth Riders Made Of?
A complete kit covers the rider from head to boot sole, and each piece has a specific job. Skimping on any single item, even one that seems minor like eye protection, undercuts the whole setup.
The core list, drawn from gear guides across both off-road and street riding, includes:
- Helmet: full-face for off-road (motocross-style) or street-legal for karts and mini bikes, always certified.
- Goggles or eye protection: shatterproof lenses, often built to a standard like Z87.1, with anti-fog coating for off-road riding.
- Gloves: padded palms and knuckle protection with enough dexterity to grip controls comfortably.
- Boots: stiff-soled and ankle-supportive, distinct from sneakers or casual footwear.
- Riding pants and jersey or jacket: abrasion-resistant material, not cotton or general athletic wear.
- Body armor: chest and back protectors, plus knee and elbow guards for rougher terrain.
Off-road vehicles like dirt bikes and ATVs put more emphasis on goggles, roost guards, and chest protection because of thrown debris and uneven terrain. Tousley Rider Supply points out that chest protectors and knee guards are essential for youth motocross riders, absorbing impacts that a jersey alone can’t stop. Go-karts and mini bikes lean harder on a full-face helmet and sturdy gloves since the ride is generally closer to the ground with fewer obstacles in the way.
| Kit Item | Off-Road (Dirt Bike/ATV) | Go-Kart/Mini Bike |
|---|---|---|
| Helmet | Full-face motocross, ventilated | Full-face or open-face, DOT rated |
| Goggles | Essential, anti-fog required | Optional, sun/wind protection |
| Body armor | Chest, back, knee, elbow guards | Lighter armor or none for karts |
| Boots | Reinforced ankle, stiff sole | Closed-toe athletic or riding boot |
Compatibility matters more than most parents expect going in. A helmet that doesn’t leave clearance for goggle straps, or gloves too bulky to work a throttle, turns a safety purchase into a daily frustration.
How Do You Choose and Fit a Youth Riding Kit?
Getting the size right takes real measurements, not eyeballing a rack of gear at a store. Rushing this step is the single most common mistake parents make.
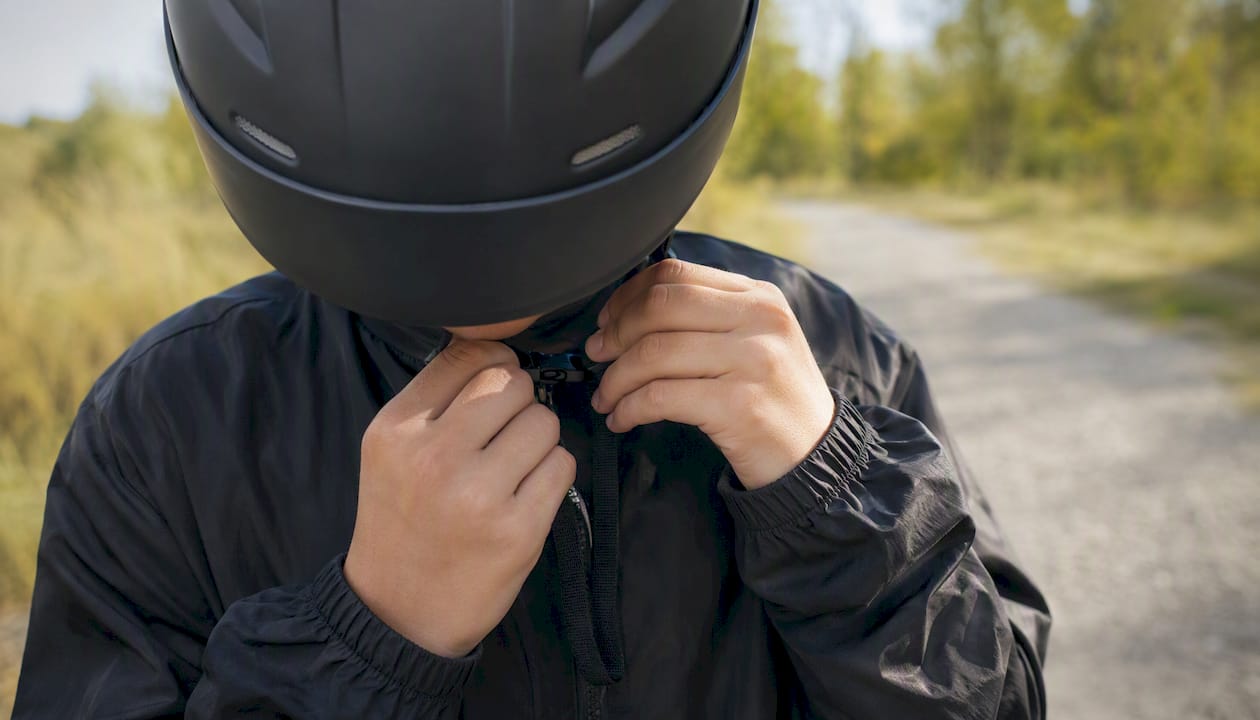
- Measure head circumference with a soft tape about an inch above the eyebrows, then match that number to the helmet maker’s chart rather than a general “youth size.”
- Check helmet snugness by having your child shake their head side to side; the helmet should move with the skin, not slide independently.
- Test the goggle seal by pressing goggles against the face while the helmet is on. Gaps at the temples mean debris gets in.
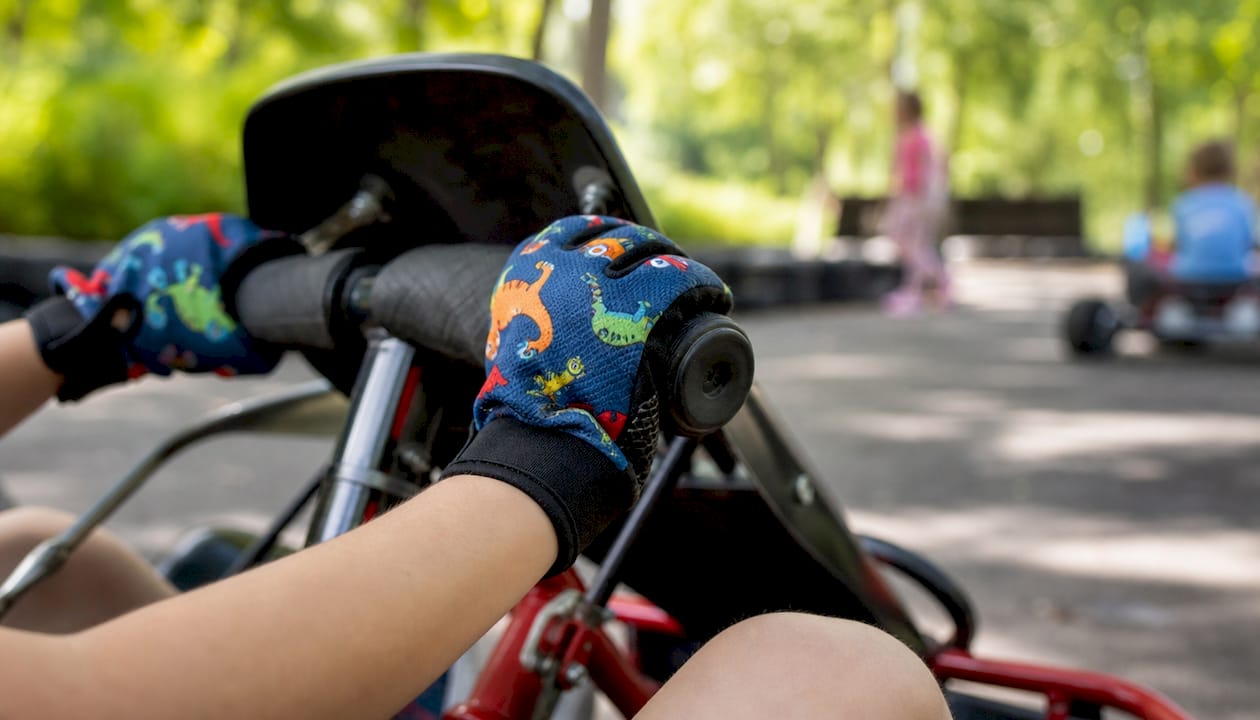
- Check glove dexterity by having your child grip a handlebar or steering wheel shape. Fingers should bend freely without bunching fabric.
- Confirm boot ankle support by checking that the sole doesn’t flex when your child stands on their toes.
- Move through armor pieces to confirm nothing restricts bending at the elbows or knees during a mock riding position.
Growth is the constant wrinkle in all of this. Redpost’s approach to sizing favors precise measurement over buying a size up, and that’s the right call for anything involving impact protection. A helmet or armor piece that’s loose to “grow into” doesn’t protect properly in the meantime. Boots and gloves have more room for adjustable straps or a half-size buffer, but the helmet should always fit the head your child has today.
Pro Tip: Don’t judge glove fit with the tags still on. Have your child actually squeeze a grip or wheel while trying gloves on. Plenty of gloves feel fine on a flat table and then bunch up the second a hand closes around something.
Which Safety Certifications Should Parents Verify?
Certification labels are the difference between real protection and gear that only looks the part. Every helmet in a starter kit should carry one of a handful of recognized marks, and where you find that mark matters as much as which one it is.
For powersport helmets, look for DOT (US Department of Transportation) or Snell certification stamped or stitched inside the shell. The GYROOR youth gear guide is blunt about this: a motocross helmet built to these standards outperforms a bicycle helmet by a wide margin on off-road terrain, even though both look similar from across a parking lot. Bicycle helmets simply aren’t built to absorb the impact forces or debris exposure that come with dirt bikes, ATVs, or go-karts.
Standards do shift by discipline, which trips parents up more than you’d think. Equestrian starter kits, for instance, typically reference ASTM F1163 certification for riding helmets, a completely different standard from what applies to motorized youth vehicles. If you’re browsing a general “youth rider” listing online, confirm the certification matches your actual vehicle type before assuming it applies.
A few red flags worth watching for on any product page:
- No visible certification code or sticker in photos of the helmet interior.
- Generic marketing language like “safety tested” with no named standard.
- Eye protection with no reference to an ANSI or Z87.1 rating.
- A bicycle or skate helmet marketed loosely as “youth riding gear.”
Beyond the helmet, most off-road resources point to DOT, ECE, or Snell as the trio worth recognizing across a full gear set, since chest protectors and neck braces increasingly reference their own construction standards too, as Tousley Rider Supply notes in its rundown of youth motocross essentials.
Should You Buy a Bundled Kit or Individual Pieces?
Buying a matched kit solves the compatibility problem outright, but it’s not automatically the right call for every family. The decision usually comes down to how much control you want over each individual piece versus how much time you want to spend sourcing gear separately.
| Factor | Bundled Kit | Individual Pieces |
|---|---|---|
| Fit compatibility | Pre-matched sizing across items | Requires manual cross-checking |
| Cost | Often lower than buying separately | Can add up piece by piece |
| Return process | Single transaction, one return | Multiple vendors, multiple policies |
| Upgrade flexibility | Limited to swapping one piece later | Full control over every component |
A commercial example makes the savings tangible: RideTo’s CBT starter bundle packages a helmet, jacket, and gloves at a price lower than sourcing each piece on its own, a pattern that holds across most beginner rider bundles regardless of vehicle type.
The pros of a bundle run deeper than price. One return process beats juggling three separate vendor policies. Sizing suggestions come pre-matched, so a helmet and goggles are far less likely to fight each other. And because everything ships together, there’s less chance a piece gets forgotten or delayed.
The tradeoff is flexibility. If your child has an unusually shaped foot or an oddly small head for their age, a bundle might force a compromise on one item. Kits also make less sense if you’re outfitting a rider with a specific long-term growth plan in mind, where buying a higher-end helmet now and cheaper interim boots makes more financial sense. For a first-time rider or a gift purchase, though, a kit removes almost all the guesswork.
What Should You Expect to Pay, and Where Should You Shop?
Costs vary by how much protection the kit covers, but a few general bands hold across most retailers. Entry-level kits covering a helmet, gloves, and basic eyewear tend to sit at the lower end. Mid-range kits that add boots and riding apparel push the price up. A full protective kit with chest and joint armor included sits at the top of the range.
Where you buy matters almost as much as what you buy:
- Powersports dealers (like Gokartsusa) sell the vehicle and the gear together, which simplifies compatibility questions since the retailer already knows what fits which vehicle.
- Specialty motocross shops often carry deeper size runs and higher-end armor for serious off-road riders.
- Equestrian shops carry their own starter kits, such as Big Dee’s kids’ English apparel package, useful if your family also rides horses, but not a substitute for motorized-vehicle gear.
- Online bundle retailers offer convenience and often lower prices, though you lose the ability to try before buying.
| Retailer Type | Strength | Watch For |
|---|---|---|
| Powersports dealer | Vehicle + gear compatibility | Fewer boutique brand options |
| Specialty motocross shop | Deep size runs, premium armor | Higher price point |
| Online bundle retailer | Convenience, often lower cost | No in-person fit check |
Before you check out anywhere, confirm three things on the product page: a clear return policy (helmets especially, since fit issues surface fast), a size chart specific to youth measurements, and photos sharp enough to read the certification label inside the helmet shell.
How Do You Maintain and Replace Starter Kit Gear?
Gear loses protective value long before it looks worn out, so a regular inspection habit matters more than most parents assume.
Run through this before every ride:
- Check helmet straps for fraying and confirm the buckle clicks solidly.
- Look the shell over for cracks, even hairline ones near vents.
- Wipe the visor or goggle lens and check for scratches that impair vision.
- Inspect glove seams for separation at the fingers or palm.
- Flex the boot sole to confirm it hasn’t gone soft or cracked.
- Check armor straps and closures for stretched-out elastic or broken clips.
Cleaning routines matter too, though they’re often overlooked. Wipe helmet interiors with a damp cloth and mild soap rather than tossing padding in a washing machine.
Replacement timing follows a few clear rules:
- Replace a helmet immediately after any hard impact, even without visible cracks. The foam liner can compress internally without showing damage on the outside.
- Replace helmets on a roughly five-year cycle regardless of impacts, or sooner if the manufacturer specifies.
- Replace boots and gloves once seams separate or soles lose their stiffness.
- Replace armor when foam feels compressed or a composite shell shows cracks, since degraded padding no longer absorbs impact the way it did new.
Why We Recommend Starting With a Bundled Kit
Gokartsusa sells youth vehicles alongside gear bundles, and that combination shapes how we think about this topic. We’re not a neutral bystander here, and we’d rather say that plainly than dance around it.
The case for bundled kits isn’t just a sales pitch, though. It comes down to three practical advantages:
- Compatibility assurance. When a retailer packages a helmet with goggles and gloves, someone has already checked that the goggle straps clear the helmet and the gloves work with the vehicle’s grips.
- Safety confidence. A retailer with vehicle inventory and gear knowledge can show certification photos and specs for every item on one product page, rather than sending you hunting across five different listings.
- Depth of stock. Carrying both the vehicle and the gear means sizing recommendations come from real product knowledge, not a generic size chart pulled from a different industry.
Parents don’t need to become gear experts overnight. They need a retailer who already did that homework, and who can show the certification, the fit chart, and the return policy right on the product page before money changes hands.
…
A Parent’s Bottom Line on Starter Kits
Price and protection pull against each other in every gear decision, and pretending otherwise doesn’t help anyone. My honest read: buy the best helmet you can afford first, then let the rest of the kit follow your budget, since no amount of savings on gloves or boots is worth compromising the one piece protecting your child’s skull. Start with a helmet-first purchase, then stage the remaining pieces as your rider’s skill and confidence grow.
Where to Find a Starter Kit for Your Young Rider
Gokartsusa is where compatibility stops being a guessing game, because we sell the vehicle and the gear side by side, so you’re not cross-referencing helmet specs against a bike you bought somewhere else three weeks ago.
If you’re shopping for a first vehicle, our youth off-road go-kart and youth ATV pages both show sizing guidance and gear notes specific to that vehicle, so you can match a kit to the ride instead of guessing. Before you buy anything, whether from us or elsewhere, check the product page for certification photos of the helmet interior, a youth-specific size chart, a clear return window, and a stated warranty. Those four details tell you more about a seller’s reliability than any star rating ever will. If your rider is stepping up to something faster, our mini bike lineup pairs with a different armor setup than a go-kart does, and our team can walk you through fit questions before you check out. Browse the youth vehicle and gear categories at Gokartsusa and reach out to our support team if you need help matching a kit to your child’s exact measurements.
Frequently Asked Questions
What is a starter kit for youth riders? A starter kit for youth riders is a bundled set of protective gear, usually a certified helmet, gloves, boots, eye protection, riding apparel, and body armor, sized and matched together for a beginner rider and their specific vehicle type.
Do go-karts require the same gear as dirt bikes? No. Go-karts generally call for a full-face or DOT-rated helmet and sturdy gloves, while off-road vehicles like dirt bikes and ATVs add goggles, chest protectors, and knee guards because of debris and rougher terrain.
How do I know if a helmet is properly certified? Check inside the helmet shell for a DOT or Snell certification sticker with a legible model and approval number. If a product listing doesn’t show this clearly in photos, treat that as a red flag before buying.
Is a bicycle helmet safe enough for a youth ATV or dirt bike? No. Bicycle helmets aren’t built for the impact forces or debris exposure common in off-road motorized riding, and gear guides consistently recommend a motocross-specific, DOT or Snell-certified helmet instead.
How often should a youth helmet be replaced? Replace a helmet immediately after any hard impact, even without visible damage, and on a roughly five-year cycle otherwise, or sooner if the manufacturer’s guidance specifies an earlier timeline.
Sources
Use the certification guides to verify labels before purchase, the gear breakdowns to confirm you’re not missing an item, and the battery resource if your family’s first vehicle runs electric rather than gas.