




Custom kart builds deliver performance that stock frames simply cannot match
Custom kart builds work because they give you direct control over the three variables that determine how a kart actually performs: frame geometry, material selection, and weld quality. A stock frame is built to fit the widest possible range of riders and conditions. A custom frame is built for you, your track, and your driving style. That difference shows up in every corner, every lap, and every year of service life.
Here is the core of why custom builds consistently outperform standard options:
- Frame geometry tuning: Custom builds let you dial in wheelbase, seat position, and chassis flex to match your weight and driving style, producing handling that a generic frame cannot replicate.
- Warping prevention through bracing: Proper frame bracing during welding keeps the chassis square, which directly protects handling accuracy and long-term durability.
- Material choice: Selecting the right tubing material, whether steel or aluminum, controls the strength-to-weight ratio and affects how the frame flexes under load.
- Welding quality: Precise tack welding and full welds prevent stress fractures and frame distortion, which are the two most common causes of kart failure.
- Ergonomic fit: Custom seat placement and pedal positioning reduce driver fatigue and improve throttle and brake response times.
- Performance tuning range: Customizing go-karts lets you tailor power, braking, and steering responsiveness to specific environments, turning your kart into a purpose-built machine rather than a compromise.
Every one of these advantages starts at the frame. Get the frame right, and everything else falls into place.
What materials and dimensions actually define your base frame
The frame is the foundation, and the material you choose for it sets the ceiling on everything else. Steel tubing remains the most common choice for custom kart frames because of its strength, weldability, and relatively low cost. Steel tubing offers strength and weldability, while aluminum extrusions provide a lightweight, rigid alternative for builders who prioritize weight savings over raw toughness.
The trade-off between the two is real and worth understanding before you order a single piece of tubing.
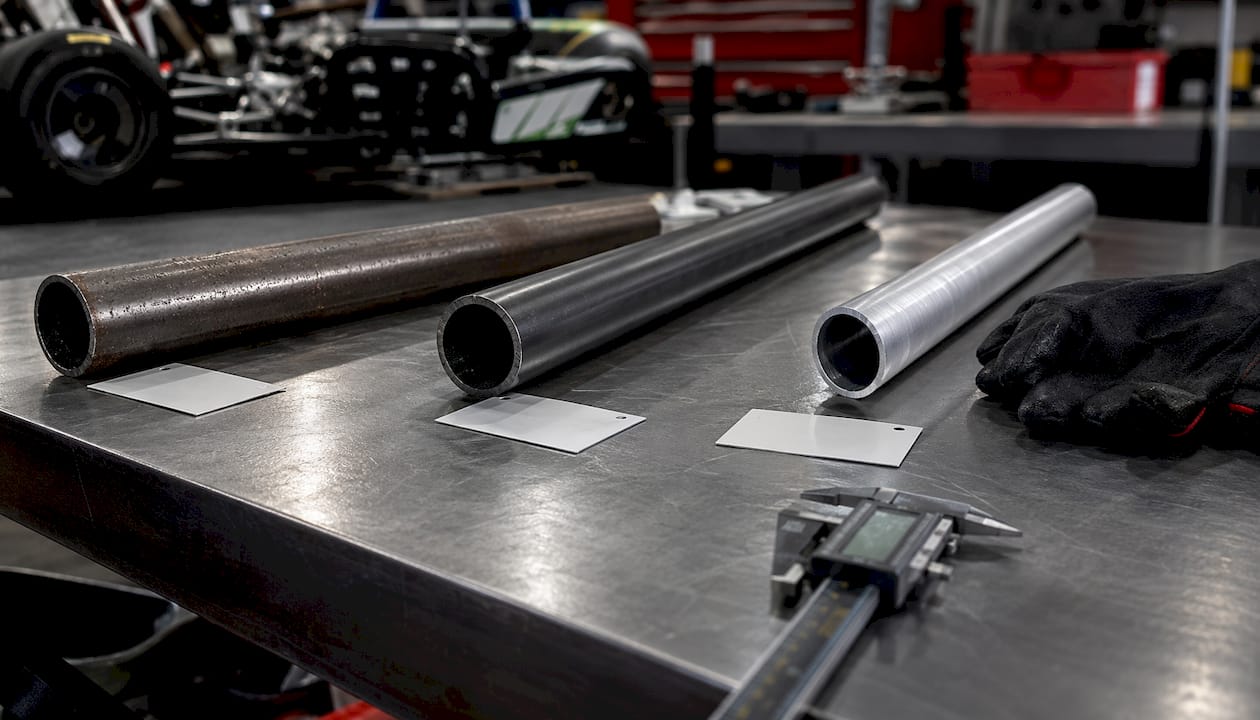
| Material | Strength | Weight | Weldability | Corrosion Resistance | Best Use Case |
|---|---|---|---|---|---|
| Mild steel (DOM) | High | Heavier | Excellent | Moderate (needs coating) | Racing, heavy-duty builds |
| Chromoly steel | Very high | Moderate | Good (requires skill) | Moderate | Performance builds |
| Aluminum | Moderate | Light | Requires TIG | Good | Lightweight recreational builds |
DOM steel, which stands for Drawn Over Mandrel, is generally stronger and more dimensionally consistent than ERW (Electric Resistance Welded) tubing, making it the preferred choice for any build where structural integrity is non-negotiable. Chromoly offers even higher tensile strength but demands more welding skill to join properly without introducing brittleness at the heat-affected zones.
Aluminum is genuinely appealing for weight-sensitive builds. It resists corrosion without a protective coating, and an aluminum extrusion can be ordered to precise lengths and tapped on the ends for clean hardware attachment. The catch is that aluminum requires TIG welding rather than MIG, which raises the skill bar considerably.
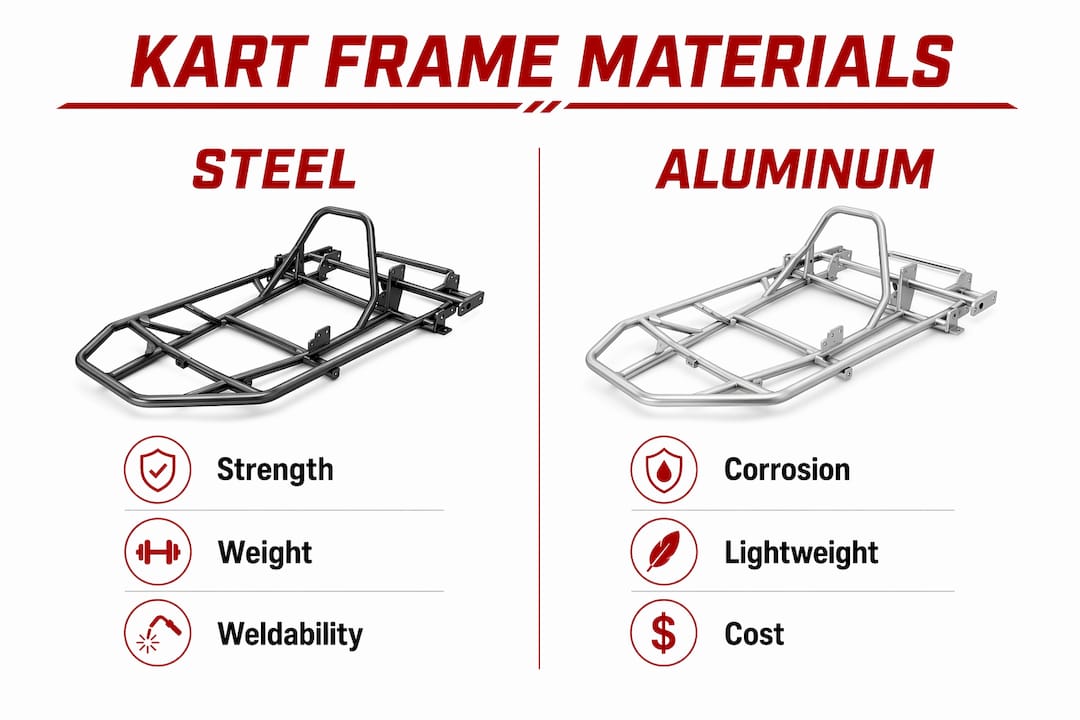
For base frame dimensions, a typical adult kart frame runs approximately standard adult kart sizes in length and width, with tubing diameter commonly sized to balance strength and weight. These numbers are not arbitrary. Wider frames improve lateral stability but add weight. Longer wheelbases smooth out high-speed handling but reduce agility in tight corners. Getting these dimensions right for your specific driver height, weight, and track type is one of the clearest custom kart performance advantages over a stock build.
Pro Tip: When selecting tubing wall thickness, thicker walls add strength but also add weight that compounds across the entire frame. For most recreational and light racing builds, 0.083-inch wall thickness in DOM steel hits the right balance between rigidity and weight.
How to secure tubing and keep your frame perfectly square
A frame that goes out of square during welding will never handle correctly. This is one of the most common and most preventable failures in DIY kart construction, and it comes down to how you set up and brace the tubing before a single weld is laid.
-
Build or source a welding fixture. A fixture holds all frame tubes in their correct positions while you work. It does not need to be elaborate. A flat steel table with clamped stops at key reference points is enough for most builds. The goal is to remove any chance of tubes shifting under heat.
-
Verify squareness with diagonal measurements. Before tacking anything, measure corner to corner diagonally across the base frame. Both diagonals must be equal. A difference of even 1/8 inch will translate into a kart that pulls to one side under braking.
-
Clamp every tube at both ends before welding. Single-point clamping lets the free end drift as heat builds. Use at least two clamps per tube, positioned as close to the weld joint as your torch clearance allows.
-
Add temporary cross-braces. Tack a scrap piece of flat bar diagonally across the frame corners before you begin welding the main joints. This brace holds the frame square while heat cycles through the primary tubing. Remove it after the main welds cool.
-
Weld in a balanced sequence. Never complete one side of the frame before starting the other. Alternate between opposite joints so heat input stays balanced and thermal contraction pulls evenly from both sides.
-
Check squareness again after every major weld. Heat distortion accumulates. Catching a small deviation after the second joint is far easier to correct than discovering a warped frame after the tenth.
Pro Tip: Clamp tension matters as much as clamp placement. Over-tightening a clamp on thin-wall tubing can deform the tube before you even strike an arc. Snug is enough. The fixture does the alignment work; the clamps just hold position.
Common pitfalls at this stage include relying on tack welds alone to hold alignment (they cannot resist the full force of thermal contraction from a complete weld pass) and skipping the diagonal check because the tubes “look straight.” Trust the measurement, not your eye.
The tack welding process that protects frame integrity
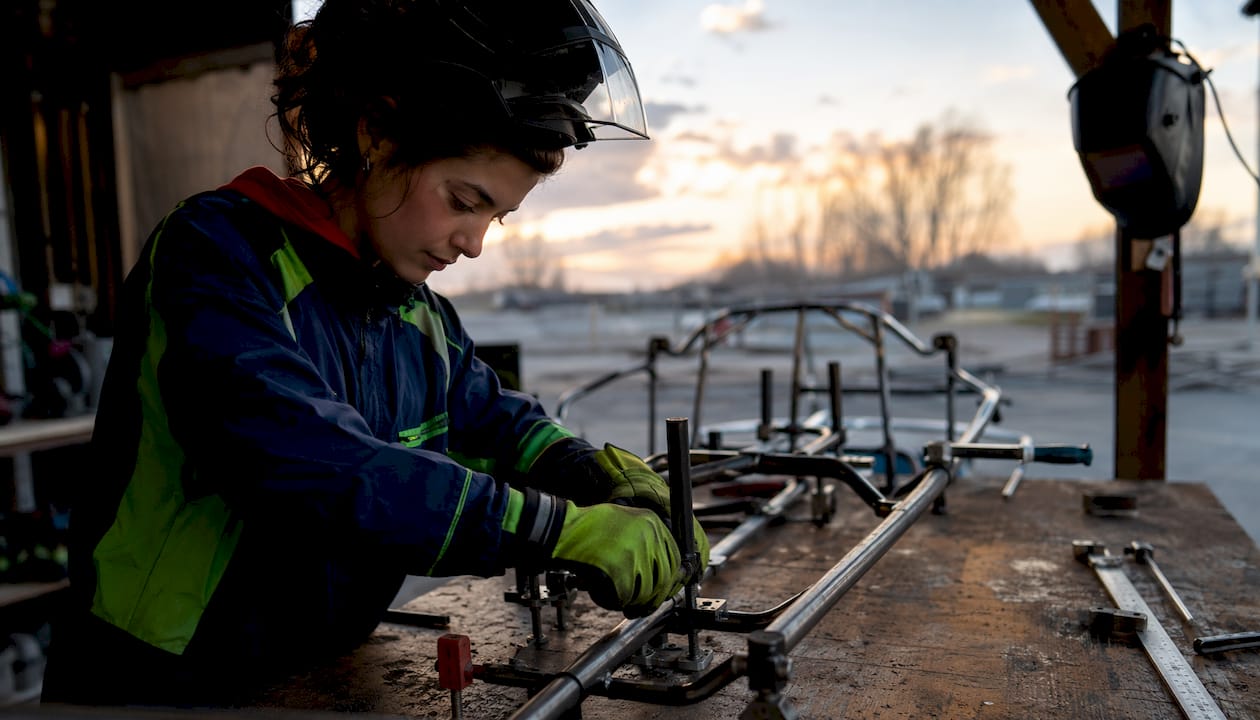
Tack welding is not a shortcut or a preliminary step you rush through. It is the technique that controls heat distortion across the entire frame, and doing it correctly is what separates a frame that stays true from one that warps under the stress of full welds.
-
Clean every joint surface. Grind or file the contact areas to bare metal. Mill scale, rust, and paint all contaminate the weld pool and introduce porosity that weakens the joint.
-
Set your welder for tack parameters. Tack welds use shorter arc time and lower heat input than full welds. For mild steel tubing, a MIG welder set slightly below your full-weld amperage gives you enough fusion to hold position without pumping excessive heat into the tube.
-
Place tacks at opposing points first. On a tube joint, place your first tack, then move to the directly opposite side of the joint for the second. This balanced approach prevents the joint from pulling in one direction as the first tack cools and contracts.
-
Use three or four tacks per joint minimum. Two tacks leave too much of the joint free to move. Three or four tacks distributed evenly around the joint perimeter lock the tube in place without locking in stress.
-
Let each tack cool before placing the next. Rushing consecutive tacks on the same joint builds up heat that defeats the purpose of the technique. A few seconds of air cooling between tacks costs nothing and protects alignment.
-
Inspect every tack before proceeding to full welds. Look for cracks, undercut, or incomplete fusion. A bad tack that gets buried under a full weld becomes a stress riser that can crack under load.
Tack welding is where frame integrity is either built or lost. A full weld can only be as good as the alignment the tacks established. Rush the tacks, and no amount of finish welding will fix a frame that has already moved.
The distinction between tack welds and full welds matters beyond just heat management. Tack welds are intentionally small and localized. They hold position. Full welds carry structural load. Treating tacks as miniature full welds, by running them too long or too hot, introduces the same distortion risk you were trying to avoid. Keep them short, keep them balanced, and let the fixture do the alignment work.
Bumper construction basics that protect without adding dead weight
Bumpers are the most overlooked structural element in a custom kart build. Most builders focus on the main frame and treat bumpers as an afterthought, but a well-designed bumper contributes to both driver protection and overall frame rigidity.
- Material choice: Steel tubing in the 1-inch diameter range is standard for front and rear bumpers. It absorbs impact energy through controlled deformation rather than transferring the full force to the main frame. Aluminum bumpers save weight but deform more permanently on hard contact.
- Attachment method: Bumpers must be welded or bolted to the main frame at multiple points. A single attachment point creates a lever arm that concentrates stress at the joint during impact. Two or more attachment points distribute that load across a wider section of the frame.
- Placement and geometry: Front bumpers are positioned slightly ahead of the front axle centerline to absorb impacts effectively. Rear bumpers protect the engine and drivetrain. Both should be positioned so that impact forces travel into the frame’s strongest structural members rather than into brackets or unsupported tubing sections.
- Weight discipline: Correct bumper attachment and use of reinforced materials provides critical safety without excessive weight penalty. Every ounce added to the bumper is an ounce that does not contribute to forward momentum. Keep bumper tubing wall thickness at the minimum that your expected impact loads require.
- Integration with frame stiffness: A bumper that ties into the frame at the right points actually adds torsional stiffness to the chassis. Think of it as a structural member that happens to also absorb impacts, not just a bolt-on safety accessory.
Standard bumper tubing for recreational and light racing builds runs 0.065–0.083-inch wall thickness. Heavier off-road builds may go thicker, but for most track applications, staying light preserves the handling balance you worked to achieve through careful frame geometry.
Expert insights on why custom builds give you a real competitive edge
The performance advantages of a custom kart build go well beyond what you can measure with a tape measure or a scale. Aerodynamic optimizations significantly reduce drag and improve lap times in competitive kart racing by managing airflow and weight distribution. A custom frame lets you position the seat, bodywork, and driver in a configuration that a stock chassis simply was not designed to accommodate.
Building a custom kart develops what experienced racers call ‘chassis intimacy.’ When you have assembled every joint, set every brace, and laid every weld yourself, you understand how the kart communicates through the steering wheel and seat. That sensitivity to vehicle dynamics is unattainable in a spec-series kart where every chassis is identical.
Chassis intimacy developed through custom building cultivates enhanced driver feedback and control, leading to improved racing skill development. You are not just building a kart. You are building your ability to read and respond to what the kart is telling you.
Professional builders emphasize ergonomic and chassis tuning as key to unlocking competitive advantages beyond what standard frames provide. The benefits stack up across several dimensions:
- Power and braking tuning: Custom builds let you spec braking systems matched to your actual weight and speed range. A well-matched braking setup prevents brake fade and gives you consistent stopping distances lap after lap.
- Steering geometry: Custom front geometry lets you dial in caster, camber, and toe settings for your specific track surface and driving style, something no stock frame offers without significant modification.
- Aerodynamic flexibility: Custom bodywork placement and panel angles can reduce drag meaningfully. Angling body panels downward by 5–10 degrees guides airflow smoothly over the chassis rather than creating turbulence.
- Weight distribution: Moving the seat position even a few inches forward or rearward shifts the weight balance between front and rear axles, directly affecting corner entry grip and exit traction.
- Driver ergonomics: Adjustable seat positioning and custom pedal placement reduce fatigue during longer sessions, which translates to more consistent lap times as a race progresses.
- Build flexibility: Custom construction prioritizes spend flexibility, allowing higher-quality components where performance matters most rather than spreading budget evenly across every part.
For anyone serious about improving kart performance, the custom build path offers a level of tuning depth that no production kart can match out of the box. The frame is where that advantage begins, and the welding quality is what makes it last.
At Gokartsusa, we share your passion for getting the most out of every build and every lap. Whether you are starting your first custom project or looking for a ready-to-ride machine to complement your garage build, we have you covered.
Check out the Sport Kart for Kids in our lineup, a 2.5hp 4-stroke built for ages 8 and up, perfect for young riders ready to experience real kart performance. We are your pit crew, your trail guides, and your fellow riders. Let’s ride.
Key Takeaways
Custom kart builds work because precise frame geometry, quality materials, and disciplined welding technique combine to produce handling, durability, and driver fit that no stock chassis can replicate.
| Point | Details |
|---|---|
| Frame geometry controls handling | Custom wheelbase and seat position tuned to your weight and track type produce handling a stock frame cannot match. |
| Material selection drives weight and strength | DOM steel offers the best strength-to-weld consistency for most builds; aluminum suits weight-sensitive applications but requires TIG welding. |
| Bracing prevents warping | Diagonal cross-braces and balanced weld sequencing keep the frame square and protect long-term alignment accuracy. |
| Tack welding protects alignment | Placing tacks at opposing joint points before full welds controls heat distortion and locks in the frame geometry you measured. |
| Chassis intimacy builds driver skill | Building your own kart develops sensitivity to vehicle dynamics that improves your ability to tune and drive the kart over time. |