




TL;DR:
- Proper ATV assembly relies on thorough preparation, proper tools, and following manufacturer torque specifications to ensure safety and longevity.
- Skipping steps or rushing can lead to safety hazards, damage, or costly repairs, so patience and attention to detail are essential.
Getting your new ATV out of the crate is one of the most exciting moments in powersports. But without a clear step by step ATV assembly process, that excitement can quickly give way to frustration, stripped bolts, and safety hazards. Most ATVs arrive partially assembled, and the gap between “mostly built” and “ready to ride” is where novice assemblers run into real trouble. This guide walks you through everything, from cracking open the crate to completing your pre-ride safety inspection, so your family can hit the trails with confidence, not guesswork.
Table of Contents
- Key Takeaways
- What you need before starting step by step ATV assembly
- The step by step quad assembly process
- Common mistakes during ATV assembly
- Post-assembly checks before your first ride
- My honest take on DIY ATV assembly
- The right ATV to build and ride with your family
- FAQ
Key Takeaways
| Point | Details |
|---|---|
| Prep before you build | Gather every tool, read the manual, and organize your workspace before touching a single bolt. |
| Torque specs protect your machine | Using a torque wrench to hit manufacturer specs prevents stripped bolts and cracked aluminum parts. |
| Tire pressure affects safety | Trail riding requires 5–7 PSI; mud and sand riding drops to 3–5 PSI for proper traction and control. |
| Post-assembly checks are non-negotiable | Inspect brakes, controls, fluid levels, and tire pressure before the first engine start. |
| Know your limits | If a step feels beyond your skill level, professional help is always the smarter choice. |
What you need before starting step by step ATV assembly
The difference between a smooth assembly and a two-hour frustration session almost always comes down to preparation. Proper preparation is one of the leading factors separating a safe, satisfying build from one that risks damage or injury. Before you open a single box, get organized.
The tools you will need
A proper ATV assembly guide starts with the right hardware. Here is what you should have on hand:
- Torque wrench (capable of reading in ft-lbs and Nm)
- Socket set with metric and standard sizes
- Combination wrenches (8mm through 19mm covers most ATVs)
- Phillips and flathead screwdrivers
- Needle-nose pliers for wire routing
- Wire connectors and electrical tape for any wiring joins
- Blue threadlocker (Loctite 243 or equivalent) for vibration-prone fasteners
- Lithium grease or anti-seize compound for axle threads and bearing surfaces
You will also want a jack stand or a low work table to hold the frame at a comfortable height. Assembling on a bare concrete floor is fine. Assembling on a sloped driveway is not.
Workspace setup and safety gear
Set up in a clean, well-lit space with enough room to move around all four sides of the machine. Keep a parts tray nearby so small hardware like bolts, washers, and cotter pins stay organized rather than rolling under a shelf. Wear safety glasses throughout the process, not just when working with chemicals. A loose spring or snapping zip tie can cause real eye damage. Gloves protect your hands during the heavier frame work, though you will want to remove them for small wiring tasks that need feel and dexterity.
Pro Tip: Read the manufacturer’s manual from cover to cover before you begin. Mark the torque specification pages. Clear, visual step-by-step instructions from the manual dramatically reduce risk and confusion during your build.
The step by step quad assembly process
This is the heart of the work. Follow these phases in order and resist the urge to skip ahead.
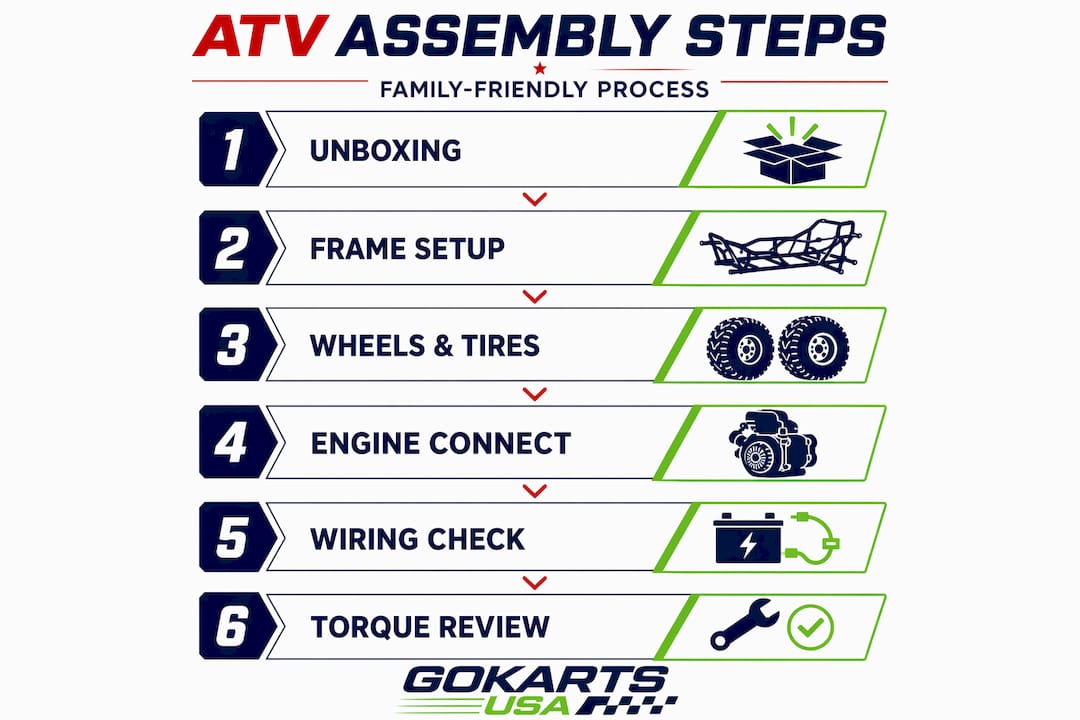
Phase 1: Unboxing and initial inspection
- Cut packing bands carefully to avoid scratching the plastics underneath.
- Lift or slide the ATV off the pallet. Have a second person help if the machine weighs over 150 lbs.
- Remove all shipping foam, cardboard inserts, zip ties, and bracing blocks.
- Locate the parts bag. It typically contains the handlebars, mirrors, foot pegs, hardware packs, and miscellaneous fasteners.
- Cross-reference every item in the parts bag against the parts list in your manual. Flag anything missing before you start building.
- Inspect the frame and body panels for any shipping damage. Document and photograph anything suspicious in case you need to file a claim.
Phase 2: Frame and chassis work
Attach the front fender and rear fender assemblies to the frame using the bolts provided. Finger-tighten everything first so you can make adjustments before committing to final torque. Once the fenders are positioned and aligned, torque the mounting bolts to the manufacturer’s specification.
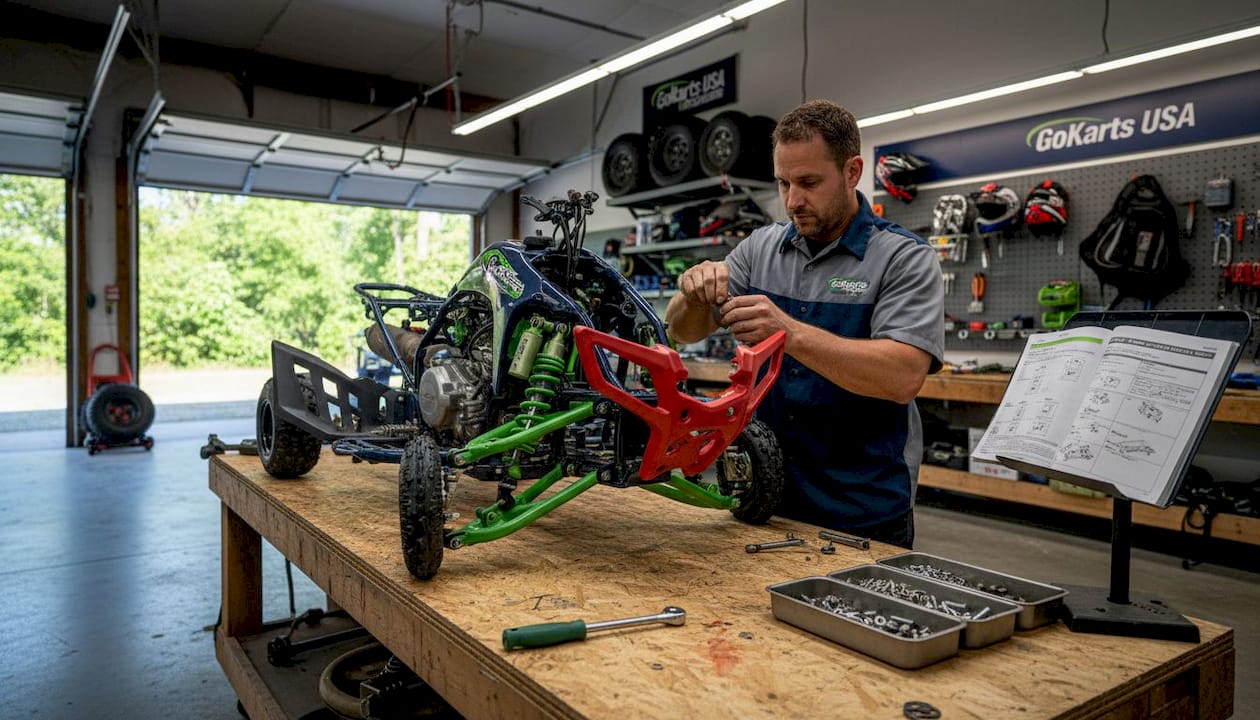
If your ATV ships with the handlebars off, slide them into the clamp and align them so the sweep feels natural from the riding position. Tighten the clamp bolts in a cross pattern to distribute pressure evenly.
Phase 3: Wheels and tires
Mount the rear wheels first since the machine will be more stable. Thread the lug nuts by hand before using a wrench, which prevents cross-threading. Torque the lugs to spec in a star pattern, not a circular one. Tire pressure should be set at 5 to 7 PSI for trail riding and 3 to 5 PSI for mud or sandy terrain. Always verify the specific range in your manual before riding.
Pro Tip: Check tire pressure with a quality gauge after installation, not just by feel. A tire can look full and still be 3 PSI below the safe minimum.
Phase 4: Engine and fuel system
Most youth and beginner ATVs arrive with the engine already mounted. Your job at this stage is to connect the throttle cable, check that the carburetor is properly seated, and confirm the fuel line from the tank to the carb is secured with a clamp on each end. No loose ends.
Air filter maintenance starts at assembly. Confirm the filter is clean, properly oiled if it is a foam type, and seated correctly before the airbox lid goes on. A dislodged filter during first startup can send debris directly into the engine.
Phase 5: Electrical wiring and controls
This phase intimidates first-time assemblers more than any other, and it does not need to. Most ATVs use a simple color-coded harness system. Match colors, push connectors together until they click, and you are done. The common mistakes here are routing cables too tight around the handlebars, which causes binding during steering, or leaving excess wire where it can snag on the frame.
Connect the kill switch, starter button, and any throttle limiter controls per the wiring diagram in the manual. If your ATV has a parental remote kill switch, this is also the stage where you pair and test that system.
| Assembly phase | Key check before moving on |
|---|---|
| Unboxing and inspection | All parts accounted for, no shipping damage |
| Frame and chassis | All fasteners torqued to spec, fenders aligned |
| Wheels and tires | Lugs torqued in star pattern, pressure set correctly |
| Engine and fuel | Fuel line clamped, air filter seated and clean |
| Electrical and controls | All connectors clicked, cables routed without binding |
Phase 6: Final torque and hardware check
Walk the entire machine and check every bolt you touched. Torque wrench use is not optional at this stage. Torque specs for drain plugs typically fall between 18 and 22 ft-lbs, while other fasteners will have their own listed values. Tighten to spec, not to feel. Over-tightening aluminum fasteners cracks them. Under-tightening lets them vibrate loose on the trail.
Common mistakes during ATV assembly
Even experienced hobbyists make these errors. Knowing them in advance puts you ahead of the curve.
- Skipping the parts count. Discovering a missing axle nut after the wheels are on wastes time and creates real safety risk.
- Ignoring torque specs. Guessing at tightness leads to stripped bolts, cracked brackets, and loose components on first ride.
- Misrouting cables. A throttle cable routed over the headlight bracket instead of behind it will bind when you turn the bars, which can prevent you from slowing down.
- Forgetting brake adjustments. Brakes often need minor cable or lever adjustment after assembly. Skipping this means reduced stopping power on day one.
- Rushing through wiring. A connector that is not fully seated will cause intermittent electrical issues that are very difficult to trace later.
If a component looks damaged when you unbox it, do not try to work around it. Contact the seller immediately and document the issue with photos. When a step in the ATV assembly instructions genuinely exceeds your skill or comfort level, the right call is to get help.
Poor preparation of a new vehicle is a leading cause of dissatisfaction and risks damage or injury. Professionals recommend hiring a mechanic if you feel inexperienced with any phase of the build.
Post-assembly checks before your first ride
You have built it. Now verify it. This phase takes time but it is what separates a fun first ride from an emergency.
Work through this checklist in order before attempting to start the engine:
- Tire pressure: Confirm PSI against manufacturer spec and terrain type.
- Brake function: Squeeze both front and rear levers. They should feel firm, not spongy. Brake pads with less than 2mm of material need to be replaced before riding, and the fluid should show no signs of leakage.
- Throttle free-play: Push the handlebars lock-to-lock while the engine is off and confirm the throttle does not stick or bind in any position.
- Controls and safety systems: Test the kill switch, remote kill switch if equipped, and any speed limiters.
- Fluid levels: Check engine oil and, if applicable, coolant. Do not start the engine dry.
- Visual hardware check: Walk the machine one final time looking for any loose bolts, hanging wires, or unsecured panels.
A standard pre-ride inspection takes about 5 minutes once you know your machine. Your first inspection after assembly will take longer. That is fine. Take the time. Once you are satisfied, start the engine and let it idle for 3 to 5 minutes before riding. Listen for unusual sounds and watch for any fluid drips underneath.
Logging your service from day one matters more than most new owners realize. Consistent service records make your ATV more reliable, easier to sell later, and safer for everyone who rides it. Check out the ATV safety tips from Gokartsusa for a solid framework to carry into your regular riding routine.
Before your first real trail session, also take a few minutes with the beginner ATV safety guide at Gokartsusa. It covers riding position, terrain awareness, and gear selection in plain terms that make a real difference for first-time riders.
My honest take on DIY ATV assembly
I have watched a lot of families crack open their first ATV crate, and the same pattern plays out every time. The excitement is real. The overconfidence is real, too. People skip the manual because they figure an ATV is “basically a big go-kart.” It is not.
In my experience, the torque wrench is the single most ignored tool in any beginner’s garage. I have seen handlebar clamps crack and wheel lugs work loose on a first ride because someone decided tight-by-hand was good enough. It is not. Torquing to spec takes an extra ten minutes. A loose wheel at speed costs a whole lot more than ten minutes.
What I have learned is that patience is the real skill here. The assembly itself is not complicated. What trips people up is rushing. Skipping the parts count because “it’ll probably be fine.” Routing a cable the fast way instead of the right way. Testing the kill switch for two seconds instead of actually riding lock-to-lock.
My advice: treat the assembly like part of the adventure. The riders who know their machines inside out are also the ones who ride them most confidently. You built it. You understand it. That is a real advantage on the trail. And when something actually does feel beyond your skill level, there is zero shame in calling for help. Getting professional assistance is not a failure. It is good judgment.
Enjoy every step of this process. The ride at the end is worth it.
— Mario
The right ATV to build and ride with your family

If you are assembling your first ATV for a young rider, Gokartsusa has a machine built exactly for this moment. The Mini Sport Kids ATV 110cc combines a reliable 110cc gas engine with parental remote start and kill switch controls, giving families real peace of mind right from the first ride. Assembly is beginner-friendly, the manual is clear, and the safety systems are genuinely confidence-building for both kids and parents. Gokartsusa’s team is here to support you through every phase of your build and beyond. Explore the Mini Sport Kids ATV today and turn that assembly guide into a ride worth remembering.
FAQ
What tools do I need for ATV assembly?
You will need a torque wrench, socket set, combination wrenches, screwdrivers, needle-nose pliers, and threadlocker. These tools cover the majority of fastening and wiring tasks in a standard ATV assembly.
How tight should ATV wheel lug nuts be?
Always torque lug nuts to the manufacturer’s specification in a star pattern, not in a circle. Guessing at tightness risks loose wheels on the trail or stripped threads on the hub.
What tire pressure should a new ATV have?
Trail riding pressure typically falls between 5 and 7 PSI, while muddy or sandy terrain calls for 3 to 5 PSI. Always confirm the exact range in your machine’s manual.
How long does a first-time ATV assembly take?
A first-time build typically takes 2 to 4 hours depending on the model and the assembler’s experience. Working methodically and reading the manual before starting will keep you on the shorter end of that range.
When should I get professional help with ATV assembly?
Seek professional help if any component appears damaged on arrival, if electrical wiring feels beyond your comfort level, or if any step in the ATV assembly instructions cannot be completed safely with the tools and skills you have available.