




Weather riding safety is the set of actions, gear choices, and decisions that reduce crash risk when weather degrades a ride. Before you throw a leg over the bike, three things matter most: check your route forecast, dress for the conditions you will actually face, and commit to a go/no-go threshold before you leave. Those three steps alone address the majority of weather-related crash factors.
The Motorcycle Safety Foundation puts it plainly: dress for the crash as well as for the ride, use the SEE (Search–Evaluate–Execute) strategy to stay ahead of hazards, and always choose a DOT-compliant helmet. Weather does not change those fundamentals — it raises the stakes on every one of them.
NHTSA data shows that motorcyclists accounted for about 16% of all traffic fatalities in 2024, with 6,228 riders killed. Visibility and protective gear are two of the clearest levers riders control. Weather degrades both. Here is where to start right now:
- Check the route forecast using a ride-specific app, not a city weather widget, before every trip.
- Dress for the conditions, including full coverage even in heat, because abrasion protection does not take a summer vacation.
- Set a hard stop threshold — lightning, sustained heavy rain, or visibility under 200 feet means you pull over, not push through.
Key Takeaways
Weather riding safety requires checking your route forecast, dressing for the crash, and applying objective stop thresholds before conditions force the decision.
| Point | Details |
|---|---|
| Use route-based forecasts | Apps like Epic Ride Weather give checkpoint-timed rain and wind data, not just a city average. |
| Double your following distance | Maintain a four-second gap in rain; in heavy rain or spray, extend to at least six seconds. |
| Stop for lightning immediately | Motorcycles offer no protection from a strike — find a substantial building and wait. |
| Dress for the crash | Full protective coverage, including a DOT helmet and abrasion-resistant gear, is required in every condition. |
| Pre-ride checks prevent failures | Inspect tires, brakes, lights, and chain before every wet or cold-weather ride. |
Table of Contents
- How do you plan a route around changing weather?
- What gear should you wear for each weather condition?
- How should you adjust your riding technique in bad weather?
- What road surfaces are most dangerous in wet conditions?
- How much following distance do you need in rain?
- How do you handle crosswinds and low visibility?
- What should you check on your bike before and after riding in bad weather?
- How do you stay safe riding in extreme heat?
- What are the biggest winter riding hazards and how do you handle them?
- When should you stop riding and seek shelter?
- What should you carry for weather-related emergencies?
- How do you build weather-riding skills through practice and training?
- What does the research say about weather riding safety?
- A rider-first philosophy on weather safety
- Gear up with Gokartsusa
- Sources
How do you plan a route around changing weather?
A single-point city forecast tells you almost nothing useful for a 150-mile ride. Temperatures, precipitation, and wind can shift dramatically across mountain passes, coastal corridors, and open plains within the same hour. Route-based forecasting solves that.
Epic Ride Weather overlays minute-by-minute precipitation, wind gusts, and real-feel temperature directly onto your planned route, timed to your expected arrival at each segment. DriveWeatherApp does something similar with checkpoint-by-checkpoint forecasts, so you know whether that storm cell hits your mountain crossing at 10 AM or 2 PM — a detail that can change your start time by three hours.
Pro Tip: Short-range forecasts (24–48 hours out) are reliable enough to make firm ride decisions. A 7-day outlook is useful for trip planning but too uncertain to dictate gear choices or departure times. Lock in your final call the night before, not a week out.
When reading a forecast for a ride, focus on these elements:
- Rain intensity and timing: light drizzle is manageable; sustained moderate-to-heavy rain warrants a delay or route change.
- Wind gust speed and direction: gusts above 30–35 mph on open highways create serious handling challenges, especially on lighter bikes.
- Temperature swing across the route: a 30-degree drop from valley to ridge means layering, not just a jacket.
- Lightning probability: any non-zero lightning risk in your corridor is a hard stop trigger, not a “we’ll see.”
Staging stops matter too. Identify a diner, gas station, or covered structure every 40–50 miles on a questionable-weather route. That pre-planned shelter point is the difference between a smart pause and a panicked pull-off on a highway shoulder.
What gear should you wear for each weather condition?
The MSF’s “dress for the crash” principle means protective coverage is non-negotiable regardless of temperature. In 90-degree heat, a mesh jacket with CE-rated armor still protects you from road rash. Shorts and a t-shirt do not.
Layering for rain and cold
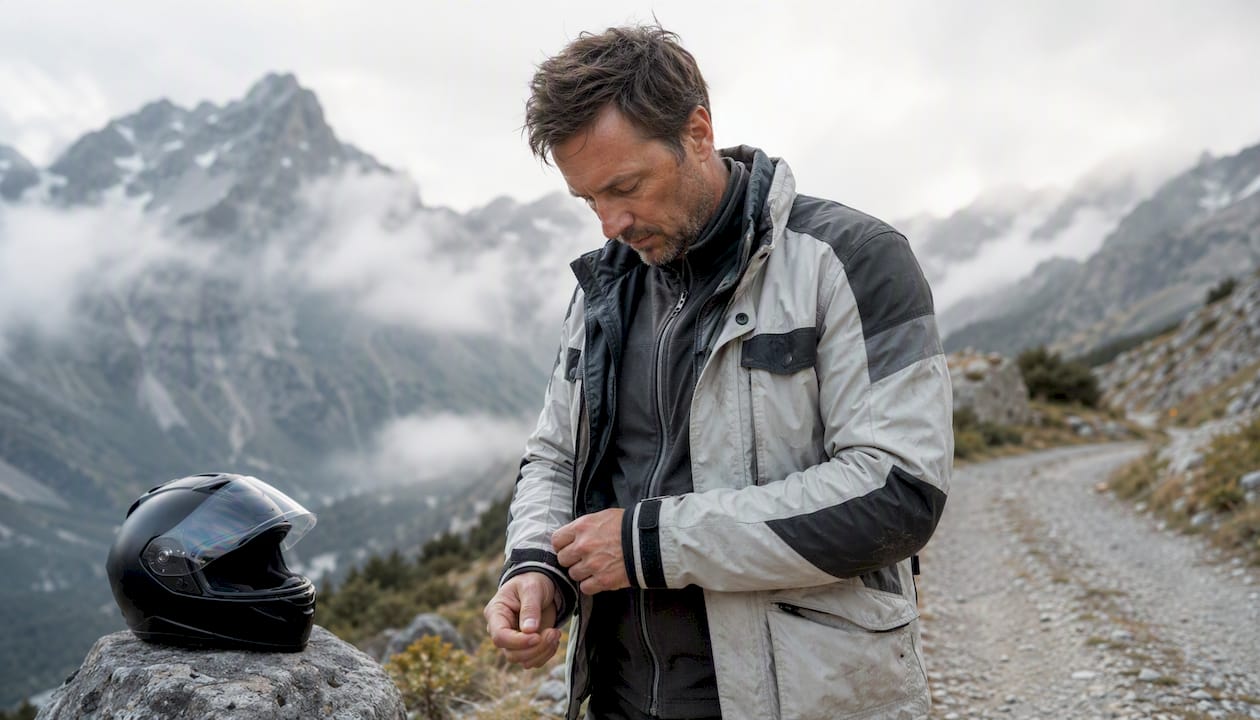
A three-layer system works for most conditions. A moisture-wicking base layer pulls sweat away from skin. An insulating mid-layer (fleece or a thin down vest) traps warmth. A waterproof outer shell — sized to fit over your other layers without restricting movement — keeps rain out. Rain suits sized too tight restrict shoulder rotation and make emergency maneuvers harder. Size up one.
Visibility and helmet anti-fog
Bright colors and retroreflective strips on your jacket, helmet, and panniers make you visible to drivers whose windshields are already blurred by rain. Keep your headlight on at all times, day or night, in any precipitation. For helmet fog, a Pinlock insert or an anti-fog visor coating is the most reliable fix. Cracking the visor slightly works in light drizzle but fails in heavy rain and highway speeds.
Pro Tip: If you ride in fog or heavy spray regularly, a dual-lens visor with a Pinlock insert eliminates fogging almost entirely. It is a $30–$60 upgrade that outperforms any spray-on treatment.
Gloves and boots by condition
- Wet conditions: waterproof gauntlet gloves that seal at the wrist; short gloves let water run straight in.
- Cold conditions: insulated waterproof gloves or a heated liner inside a waterproof shell; bar mitts (handlebar covers) add a surprising amount of warmth on long cold rides.
- Hot conditions: perforated leather or textile gloves with palm padding; full hand coverage still matters for abrasion protection.
- Boots: ankle-covering, oil-resistant soles in all conditions; waterproof boots or waterproof boot covers in rain; insulated boots or heated socks in cold.
Heated gear — jacket liners, glove liners, and pant liners — runs off your bike’s 12V system and transforms cold-weather riding comfort. If you ride year-round in northern states, it is worth the investment.
How should you adjust your riding technique in bad weather?
The core rule is simple: smooth, earlier, and smaller inputs. Every throttle roll, brake squeeze, and steering input needs to be gentler and initiated sooner than it would be in dry conditions. Traction margins shrink in rain, cold, or on contaminated surfaces, and abrupt inputs use up those margins instantly.
Progressive braking and cornering
- Begin braking earlier than feels necessary — wet stopping distances can be double or more compared to dry pavement.
- Apply both brakes progressively, building pressure rather than grabbing.
- Reduce corner entry speed before the turn, not mid-corner. Scrubbing speed mid-lean on a wet surface is where low-sides happen.
- Minimize lean angle. Upright cornering — slowing more before the turn and carrying less speed through it — keeps more tire contact patch on the road.
- Avoid throttle-on until the bike is tracking straight or nearly straight out of the corner.
Lane position and the SEE strategy
The MSF’s SEE strategy — Search, Evaluate, Execute — becomes more demanding in bad weather because your search window needs to expand and your evaluation time shrinks. In rain, look further ahead than you normally would, identify escape paths (the shoulder, a gap in traffic, a wider lane position), and execute any avoidance maneuver earlier.
- Hold a neutral lane position in most conditions to give yourself room to move left or right.
- Avoid the center of the lane where oil accumulates; the tire tracks of preceding vehicles offer drier, cleaner pavement.
- In reduced visibility, position yourself where you are most visible to drivers behind you — usually slightly off-center toward the side a following driver’s eyes naturally track.
What road surfaces are most dangerous in wet conditions?
Wet pavement is not uniformly slippery. Certain surfaces become dramatically more hazardous than the surrounding road, and pattern recognition is what keeps you upright.
The highest-risk surfaces in wet conditions, in rough order of danger:
- Painted lines, crosswalks, and lane markings: these become nearly as slick as ice when wet. Cross them straight-on with the bike upright whenever possible, per Motorcycle Safety Academy guidance.
- Manhole covers and steel utility plates: zero texture when wet. Treat them like painted lines.
- Bridge decks and metal grating: bridge surfaces cool faster than road surfaces, freeze earlier, and drain differently. Approach with reduced speed and no lean.
- Gravel and sand at intersections: especially common after storms or near construction. Brake before you reach it, not on it.
- Wet leaves: October and November in wooded areas; wet leaves have roughly the same grip as wet ice.
Pro Tip: The first 10–20 minutes of a rainstorm are the most dangerous. Oil and surface debris float to the top of the pavement before rain washes them away, creating a thin slick film. Erie Insurance specifically flags this window — if you can wait it out under cover, do it.
Puddles deserve their own caution. Standing water hides potholes, road damage, and depth changes. Ride around puddles when safe; if you must ride through, do so upright, at reduced speed, with no braking or steering input mid-puddle.
How much following distance do you need in rain?
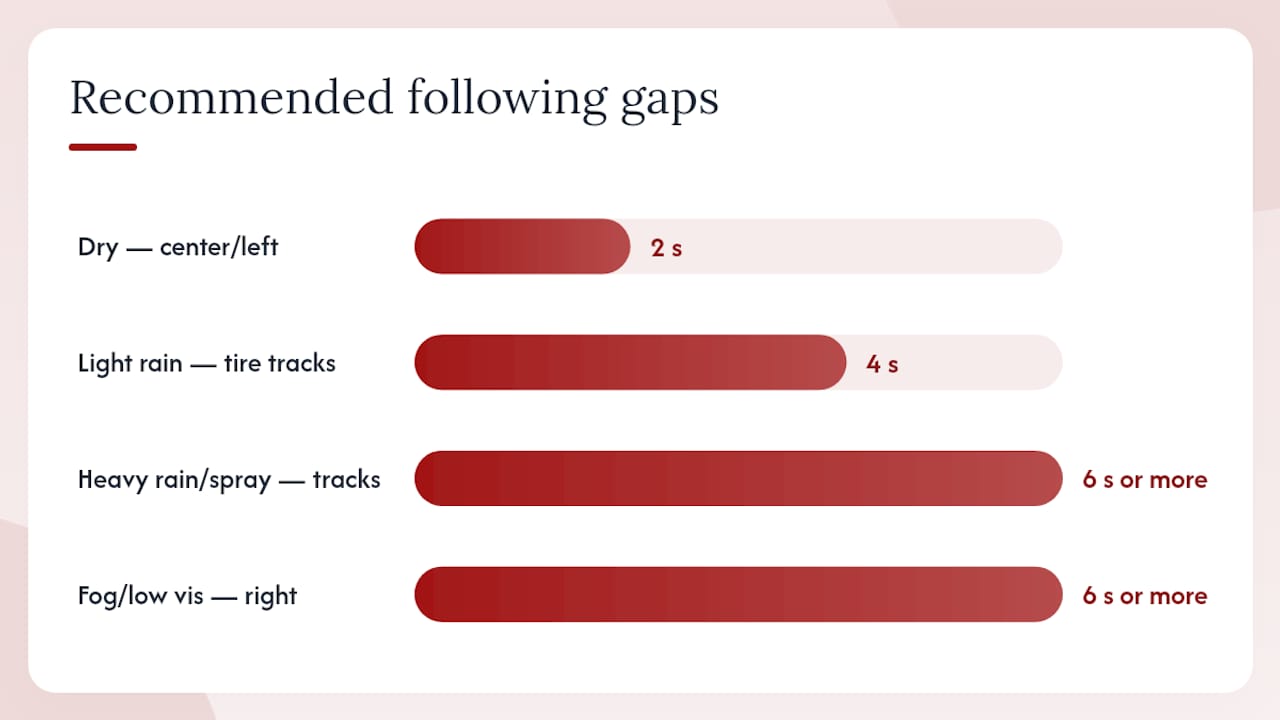
In dry conditions, a two-second following gap is a commonly cited baseline. In rain, double that to at least four seconds. In heavy rain with spray from trucks or standing water on the road, extend to six seconds or more. The math is straightforward: wet stopping distances are longer, your visibility is reduced, and the vehicle ahead may brake suddenly for a hazard you cannot yet see.
Lane positioning reinforces following distance. Riding in the tire tracks of the vehicle ahead gives you drier pavement and a clearer sightline past the vehicle. The center of the lane accumulates oil and water; the tire tracks drain faster and offer better grip.
| Condition | Recommended following gap | Lane position |
|---|---|---|
| Dry pavement | 2 seconds | Center or left-of-center |
| Light rain | 4 seconds | Tire tracks of vehicle ahead |
| Heavy rain or spray | 6 seconds or more | Tire tracks, increase lateral buffer |
| Fog or low visibility | 6 seconds or more | Right-of-center, maximize conspicuity |
For visibility aids in poor weather: use low beams in fog (high beams reflect off moisture and reduce your own forward visibility), keep retroreflective gear on, and avoid riding in another vehicle’s blind spot. If a driver cannot see you, your following distance means nothing.
How do you handle crosswinds and low visibility?
Crosswinds are one of the most underestimated hazards in motorcycle riding. A gust that a car driver barely notices can push a bike a full lane width in under a second on an open highway.
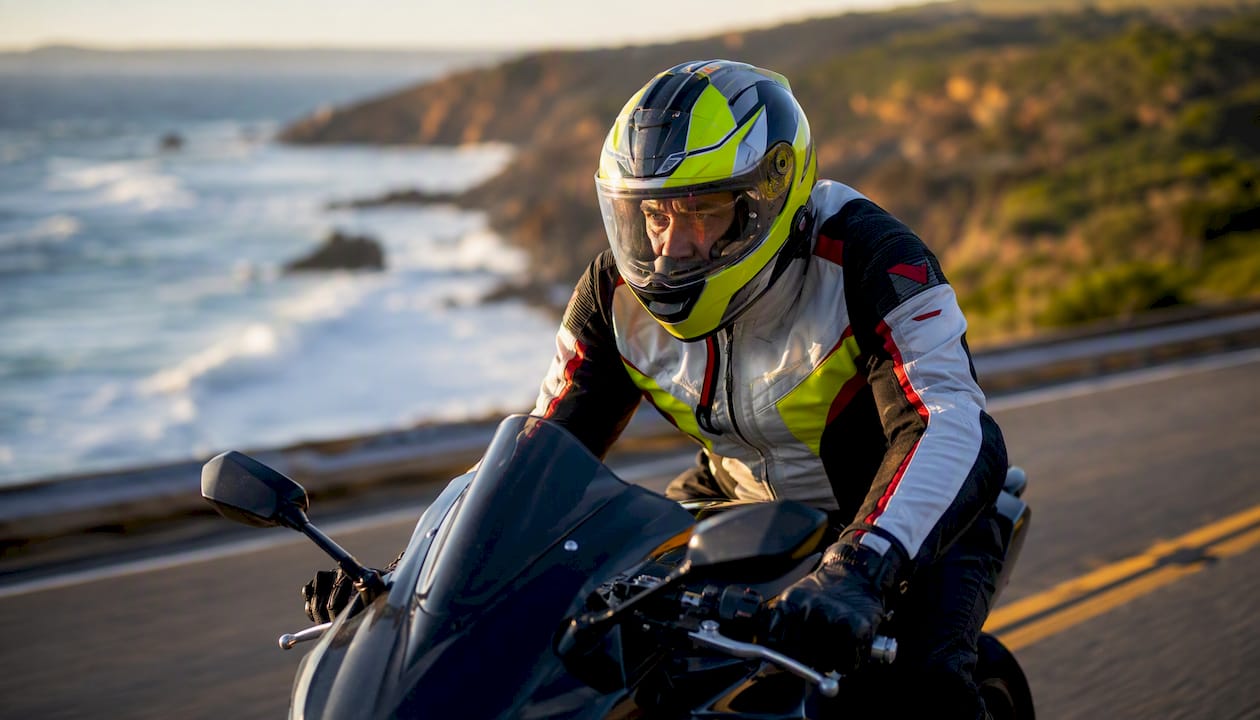
The immediate rule: reduce speed, widen your visual search, and lower your profile. Tucking your elbows in and dropping your head slightly reduces your wind profile and helps the bike track more predictably. Lean slightly into a sustained crosswind — but stay relaxed. Tense arms transmit every gust directly to the bars and amplify the effect.
Pro Tip: Bridges and highway overpasses funnel wind. The gust that hits you at the bridge entrance is often stronger than anything you felt in the mile before it. Move to the upwind side of your lane before you reach the bridge so a gust pushes you toward the center rather than toward the guardrail.
For fog, spray, and dust:
- Drop speed until your stopping distance matches your visible distance ahead.
- Use low beams. High beams in fog create a wall of reflected light that reduces forward visibility.
- Increase your scan frequency — check mirrors every 5–7 seconds, not every 10–12.
- If visibility drops below 200–300 feet, pull off the road at the next safe exit. Riding in near-zero visibility is not a skill problem; it is a physics problem.
When dust storms hit (common in the Southwest), pull completely off the road, turn off your lights so following drivers do not steer toward them, and wait it out. No destination is worth a rear-end collision in a dust wall.
What should you check on your bike before and after riding in bad weather?
A bike that is mechanically sound in dry conditions can become unpredictable in rain, cold, or mud. Pre-ride checks take five minutes and address the most common weather-related failure points.
Pre-ride checklist
- Tires: check tread depth and pressure. Worn tires lose wet-weather grip dramatically. Cold temperatures drop tire pressure; add air if needed before riding. For wet-weather tire performance, look for tires with siping and a compound rated for mixed conditions.
- Brakes: squeeze both levers and check for firm feel. Spongy brakes in wet conditions are a serious hazard. Check brake condition and pad wear before any wet-weather ride.
- Lights: front, rear, and brake lights all need to work. Visibility is already reduced in rain; a dead brake light makes you invisible to following traffic.
- Chain and fluids: check chain tension and lubrication. A dry chain in rain accelerates wear and can affect power delivery. Check coolant and oil levels.
- Windshield and visor: clean and treated for water repellency.
Post-rain and post-salt care
After riding in rain or on salted winter roads, rinse exposed metal with fresh water. Salt accelerates corrosion on brake components, frame hardware, and exhaust. Dry and relube the chain immediately — a wet chain left overnight begins to rust within hours. Air out your helmet liner and waterproof gear layers; trapped moisture breeds mildew and degrades foam padding over time.
How do you stay safe riding in extreme heat?
Heat is a slower threat than rain or ice, but it is just as real. Cognitive performance degrades before most riders notice physical symptoms, which means your decision-making suffers before you feel sick.
Plan rides for early morning or evening when temperatures are below 90°F when possible. If you must ride in peak heat, hydrate before you leave — not just during the ride. The Red Cross extreme heat checklist recommends drinking water consistently throughout heat exposure, not waiting until you feel thirsty. Thirst is a late signal.
Dew point matters more than air temperature for rider comfort. A 95°F day with a dew point below 55°F is manageable with ventilated gear. A 90°F day with a dew point above 70°F feels suffocating and accelerates heat exhaustion. Check dew point, not just temperature, when planning summer rides.
Signs of heat illness to watch for in yourself or a riding partner:
- Heavy sweating that suddenly stops, or no sweating despite extreme heat
- Confusion, slurred speech, or disorientation
- Nausea, headache, or dizziness while stopped
- Skin that feels hot and dry to the touch
If any of these appear, stop riding immediately, move to shade, apply cool water to the neck and wrists, and call for help if symptoms do not improve within 15 minutes. Heat stroke is a medical emergency.
Practical cooling strategies on the bike: a cooling vest (soaked in water before the ride) under a mesh jacket, electrolyte tablets in your water bottle, and a stop every 60–90 minutes in shade during peak heat hours.
What are the biggest winter riding hazards and how do you handle them?
Cold changes everything about how a motorcycle behaves. Tires take longer to reach operating temperature, braking distances increase on cold pavement, and the hazards themselves are often invisible.
The U.S. Army Combat Readiness Center identifies ice, salt, gravel, wet leaves, and pressure ridges as the primary winter riding hazards. Salt and grit spread by road crews improve car traction but collect in the tire tracks motorcycles prefer, creating loose, contaminated surfaces. Ride in the cleaner center strip between tire tracks on heavily salted roads — the reverse of the rain-riding rule.
Black ice is the most dangerous because it is invisible. It forms on bridge decks, in shaded sections, and anywhere water pools and refreezes overnight. If the temperature is near or below freezing and the road looks wet but not dirty, treat it as ice.
Pro Tip: Ride shorter distances in winter. Cold tires, cold muscles, and reduced daylight hours all compress your safety margin. A 200-mile summer day becomes a 100-mile winter day for the same level of risk.
Winter-specific gear priorities:
- Insulated, waterproof gloves or heated glove liners — cold hands lose fine motor control within minutes.
- Heated grips or bar mitts for extended cold rides.
- Windproof outer layer over insulated mid-layer; wind chill at highway speeds is severe even at 40°F.
- Anti-fog visor or Pinlock insert — cold air and warm breath create constant fogging.
- Boot insulation or heated socks; cold feet affect brake and shift feel.
When should you stop riding and seek shelter?
Experienced instructors frame weather riding as a low-risk decision-making exercise: the right call is often not to ride, or to stop. Here are objective thresholds, not judgment calls.
Stop immediately for:
- Lightning anywhere in your visible area. Motorcycles offer zero protection from a strike. Erie Insurance is unequivocal: seek shelter immediately. A gas station canopy does not count — find a substantial building.
- Visibility below 200–300 feet from fog, heavy rain, or dust. Your stopping distance at 40 mph exceeds 100 feet in wet conditions; you need more than that to react.
- Sustained heavy rain with standing water on the road surface. Hydroplaning is possible on a motorcycle at speeds as low as 30 mph on standing water.
- Gale-force crosswinds (sustained above 40 mph) on open roads or bridges.
Shelter checklist when you pull over:
- Choose a gas station, restaurant, or covered parking structure — not a highway shoulder.
- Secure the bike on its side stand on level ground; wind can topple a parked bike.
- Notify someone of your location and expected delay.
- Check updated forecast before resuming.
Pre-plan bailout points on every long route. Identify a town or structure every 40–50 miles where you could stop safely. That mental map is what separates a weather delay from a weather emergency.
What should you carry for weather-related emergencies?
A compact emergency kit adds less than three pounds to your load and covers the most likely weather-related incidents. Pack it in a waterproof dry bag or a sealed inner pocket.
Pack checklist:
- Fully charged phone in a waterproof case or bag
- Portable battery pack (10,000 mAh handles two full phone charges)
- Basic tool kit: tire plugs, CO2 inflators, multi-tool, zip ties
- Compact first-aid kit: bandages, antiseptic wipes, emergency blanket, nitrile gloves
- Hi-vis vest (folds to pocket size; wear it if you stop on a roadway)
- Weather-appropriate spare layer (rain suit or an extra base layer)
- Electrolyte packets and a water bottle
If a weather-related incident occurs:
- Move yourself and the bike off the active roadway immediately.
- Put on the hi-vis vest before doing anything else.
- Assess injuries — your own first, then any other party involved.
- Call 911 if there are injuries or the bike is blocking traffic.
- Protect yourself from the elements: use the emergency blanket if cold or wet, move to shade if hot.
- Notify your emergency contact with your location.
Keep electronics in sealed waterproof bags inside your luggage. A phone that dies from water intrusion in a remote area is a genuine safety risk, not just an inconvenience.
How do you build weather-riding skills through practice and training?
Reading about weather riding safety is the start. Turning it into muscle memory requires deliberate practice in controlled conditions before you need those skills in a real storm.
The most direct path is a state-approved Motorcycle Safety Foundation course. MSF’s Basic RiderCourse and Advanced RiderCourse both cover progressive braking, low-speed control, and hazard avoidance — the exact skills that degrade first in bad weather. Find a state-approved course through your state’s DMV or the MSF course locator. Many states offer discounts or insurance credits for completion.
Beyond formal courses, structured self-practice builds the same skills:
- Empty parking lots: practice threshold braking on wet pavement (after rain, before it dries) to feel how stopping distance changes.
- Low-speed figure-eights: build balance and throttle control at speeds where a drop is low-consequence.
- Mild wet-condition rides: short, familiar routes in light rain build confidence without high stakes.
Pro Tip: The 30/60/90-day framework works well for skill building. In the first 30 days, focus on braking drills and slow-speed control in a parking lot. In the next 30, add short wet-condition rides on familiar roads. By day 90, you should be comfortable making go/no-go decisions and executing smooth inputs in light rain without conscious effort.
For ATV and powersports riders, the same cognitive skills — SEE strategy, hazard recognition, and progressive inputs — transfer directly to weather riding. Practice is never wasted.
What does the research say about weather riding safety?
The evidence behind this guide’s key rules is worth stating plainly, because the numbers change how seriously riders take the advice.
NHTSA’s 2024 data puts motorcyclist fatalities at 6,228, representing about 16% of all traffic deaths despite motorcycles being a small fraction of registered vehicles. Visibility and protective gear are two of the most consistent factors in survivability. Weather degrades both simultaneously.
Route-based forecasting tools like Epic Ride Weather and DriveWeatherApp represent a genuine improvement over city-point forecasts for long-distance riders. A checkpoint-timed forecast tells you whether rain hits your mountain pass at mile 80 or mile 120 — a detail that changes your clothing choice, your start time, and your bailout plan.
| Safety rule | Source | Core finding |
|---|---|---|
| Double following distance in rain | Motorcycle Safety Academy | In rain, double to at least four seconds; in heavy rain or spray, extend to six seconds or more |
| Stop immediately for lightning | Erie Insurance | No motorcycle protection from direct strike |
| Dress for the crash | MSF | Full coverage required even in heat |
| Route-based forecasting | Epic Ride Weather / DriveWeatherApp | Checkpoint-timed forecasts outperform city forecasts |
The lightning rule deserves no nuance: stop, find a substantial building, and wait. A motorcycle offers no protection from a direct strike or a ground current. No schedule justifies the risk.
A rider-first philosophy on weather safety
Weather riding safety is not about fear. It is about keeping the freedom to ride another day.
The conservative, rider-first approach this guide reflects comes from a simple belief: the best riders are not the ones who push through the worst conditions. They are the ones who read conditions accurately, make smart go/no-go calls, and arrive home. Every threshold in this guide — the four-second following gap, the lightning stop rule, the 200-foot visibility limit — exists because someone learned it the hard way.
What most riders underestimate is how quickly conditions compound. Rain reduces visibility. Reduced visibility increases following distance needs. Increased following distance requires earlier braking. Earlier braking on wet painted lines causes a low-side. Each factor alone is manageable. Together, they create crashes that feel sudden but were actually predictable.
The gear, the technique, the forecast check — none of it is complicated. What separates riders who stay safe from those who do not is the habit of doing all of it, every time, before conditions demand it. Gokartsusa’s powersports safety resources and ATV safety guides reflect the same philosophy: ride prepared, ride smart, and ride often.
Gear up with Gokartsusa

Whether you are gearing up for your first ride or adding to your powersports fleet, Gokartsusa has the vehicles and accessories built for riders who take safety seriously. From the Sport Kart Kids Gas Go Kart to the Gas Powered Mini Bike — every model ships free with safety features designed for real-world riding. Explore the full lineup at Gokartsusa and ride with confidence.
Sources
These are the primary sources behind this guide, each worth bookmarking for ongoing reference:
- If You Ride A Motorcycle - Motorcycle Safety Foundation
- Motorcycle Safety: Helmets, Motorists, Road Awareness | NHTSA
- Riding Smart: How to Stay Safe When the Weather Turns – Motorcycle Safety Academy
- Motorcycle Safety Tips for Riding in Bad Weather | Erie Insurance
- Epic Ride Weather
- DriveWeatherApp — Biker weather planning
- Red Cross — Extreme Heat Safety Checklist
- Riding Through Winter - U.S. Army Combat Readiness Center